Before & After
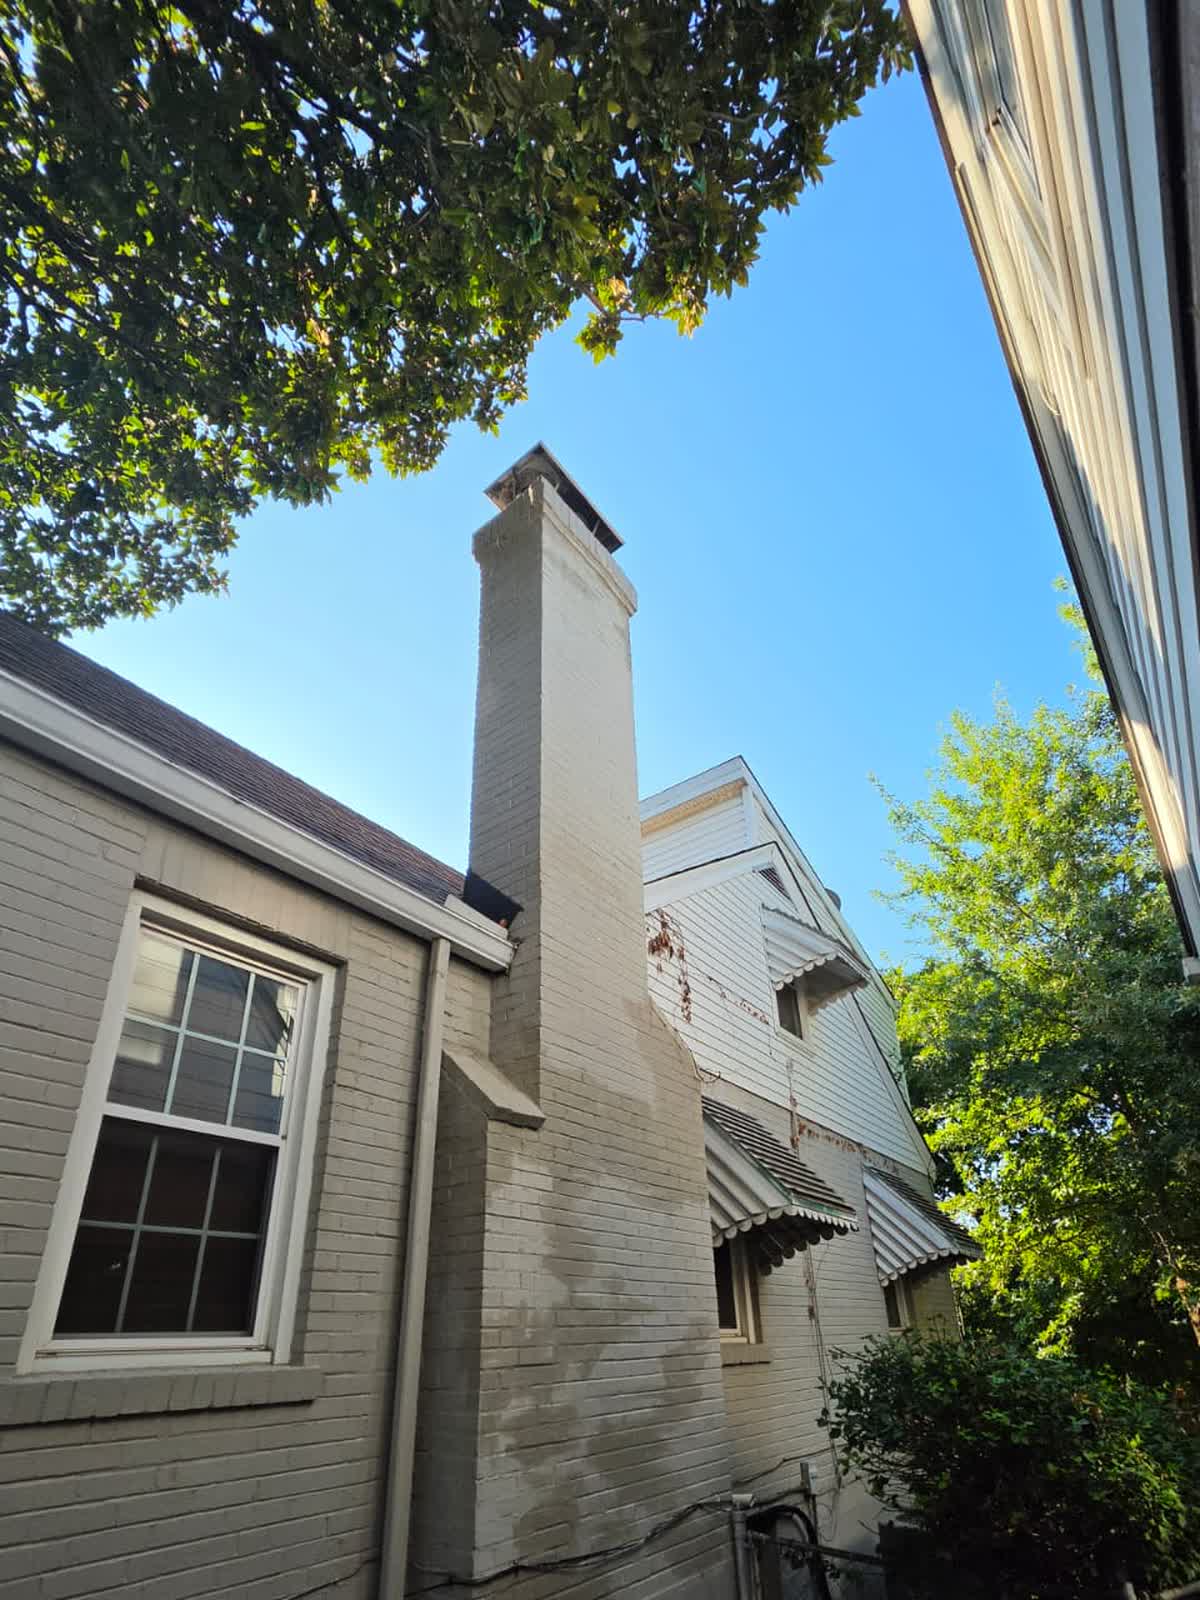
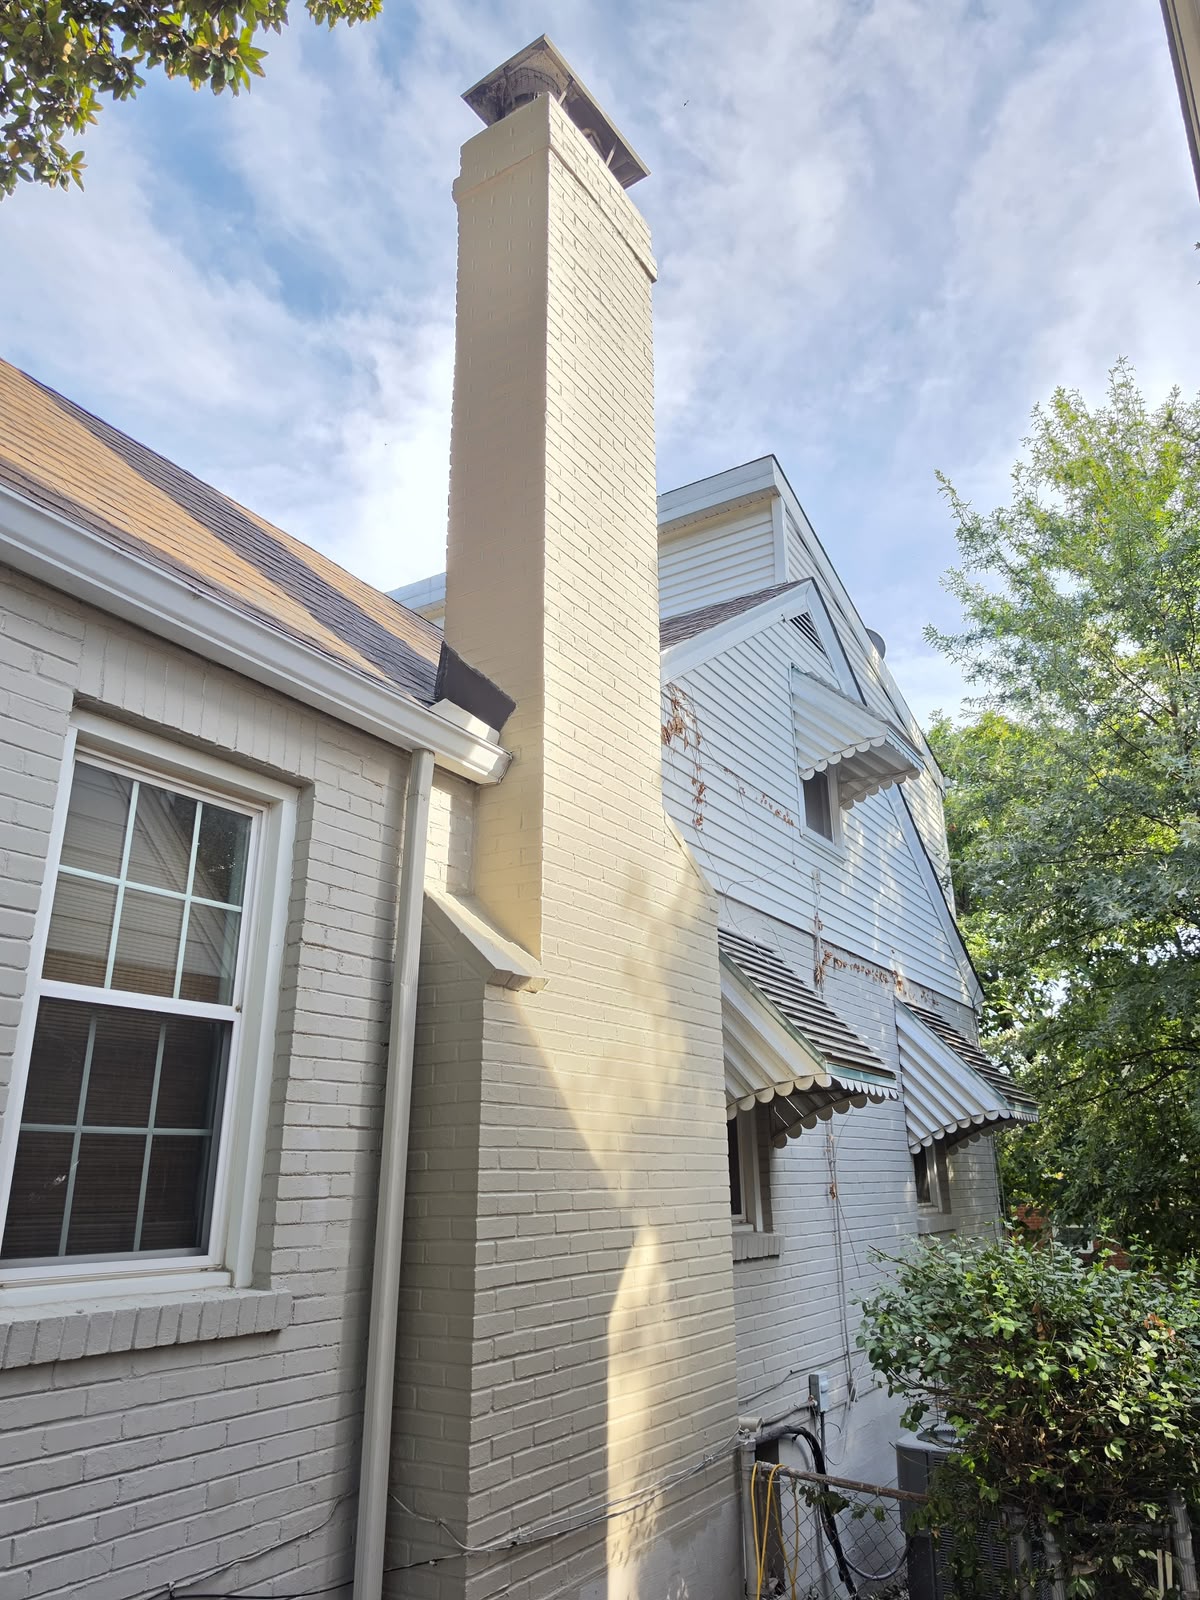
Project Overview
This homeowner had been chasing the same leak for a long time. Several companies had already been out. The last one charged about $2,500 to repair sections of the masonry and said it would not leak again. It leaked again. After that another company pulled the shingles back and redid the flashing around the chimney. The water kept coming in.
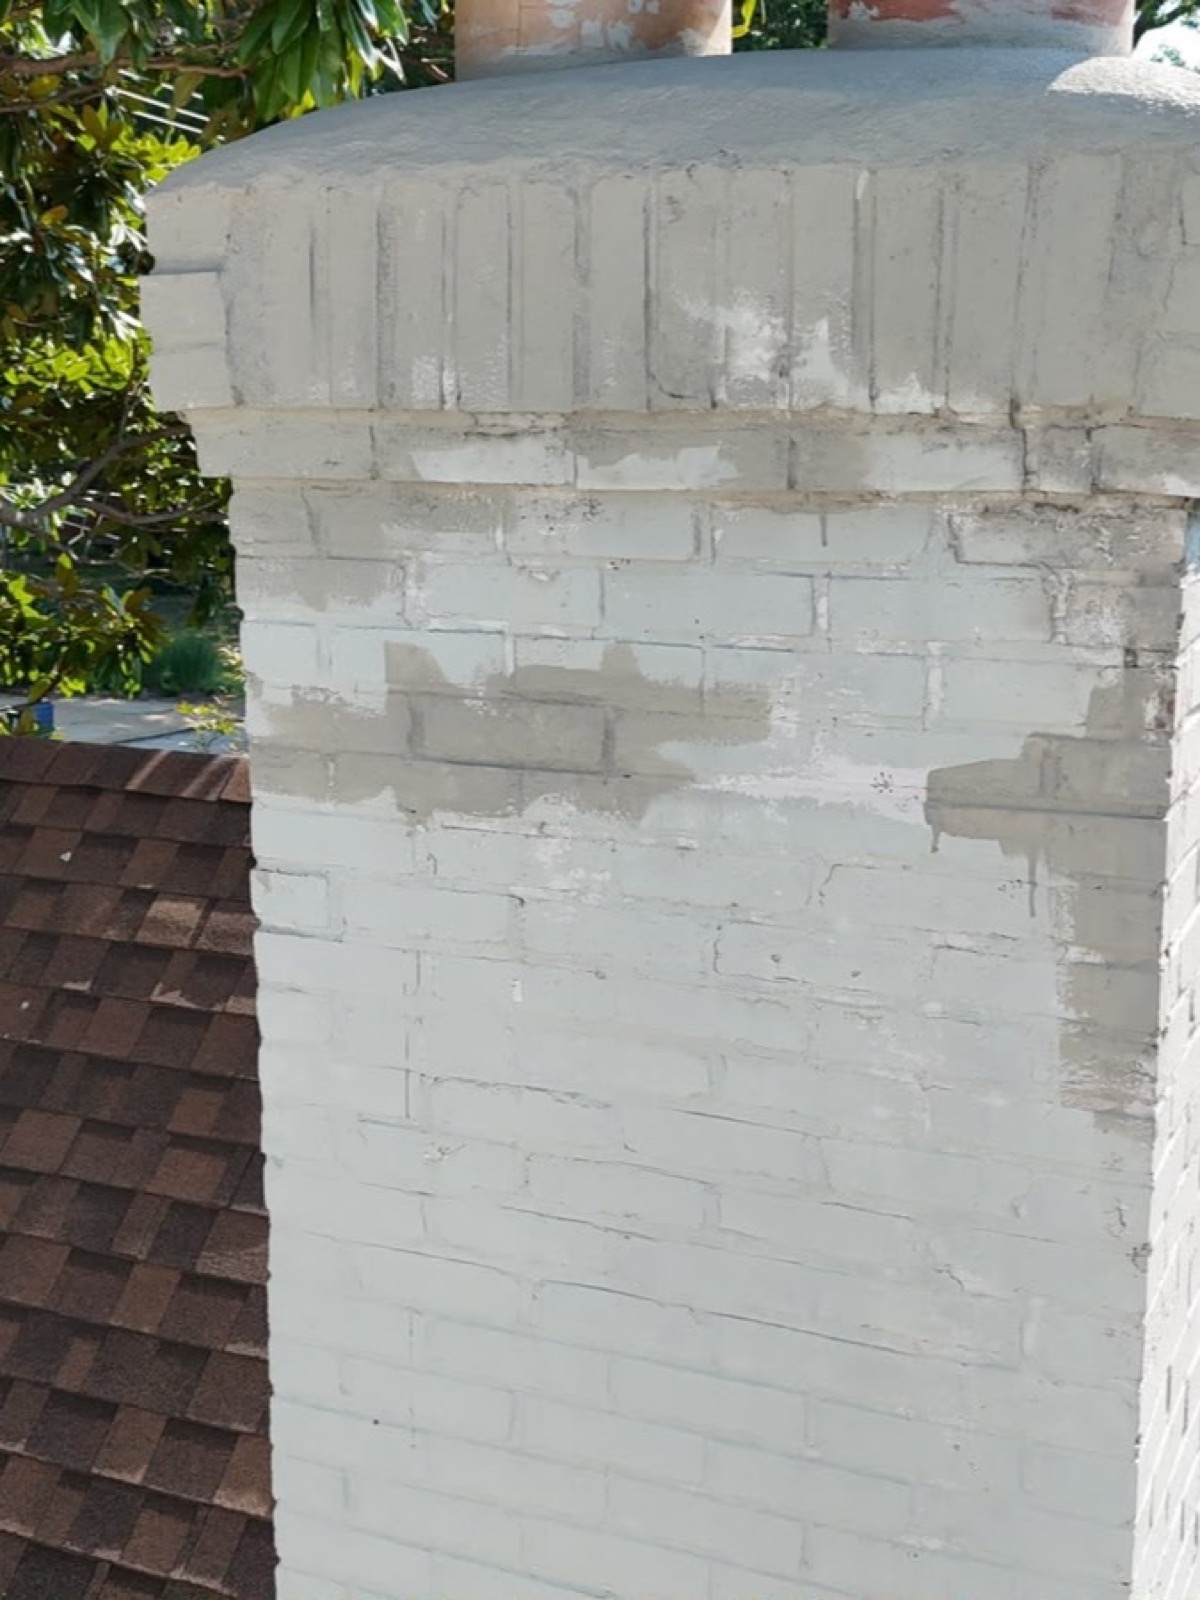
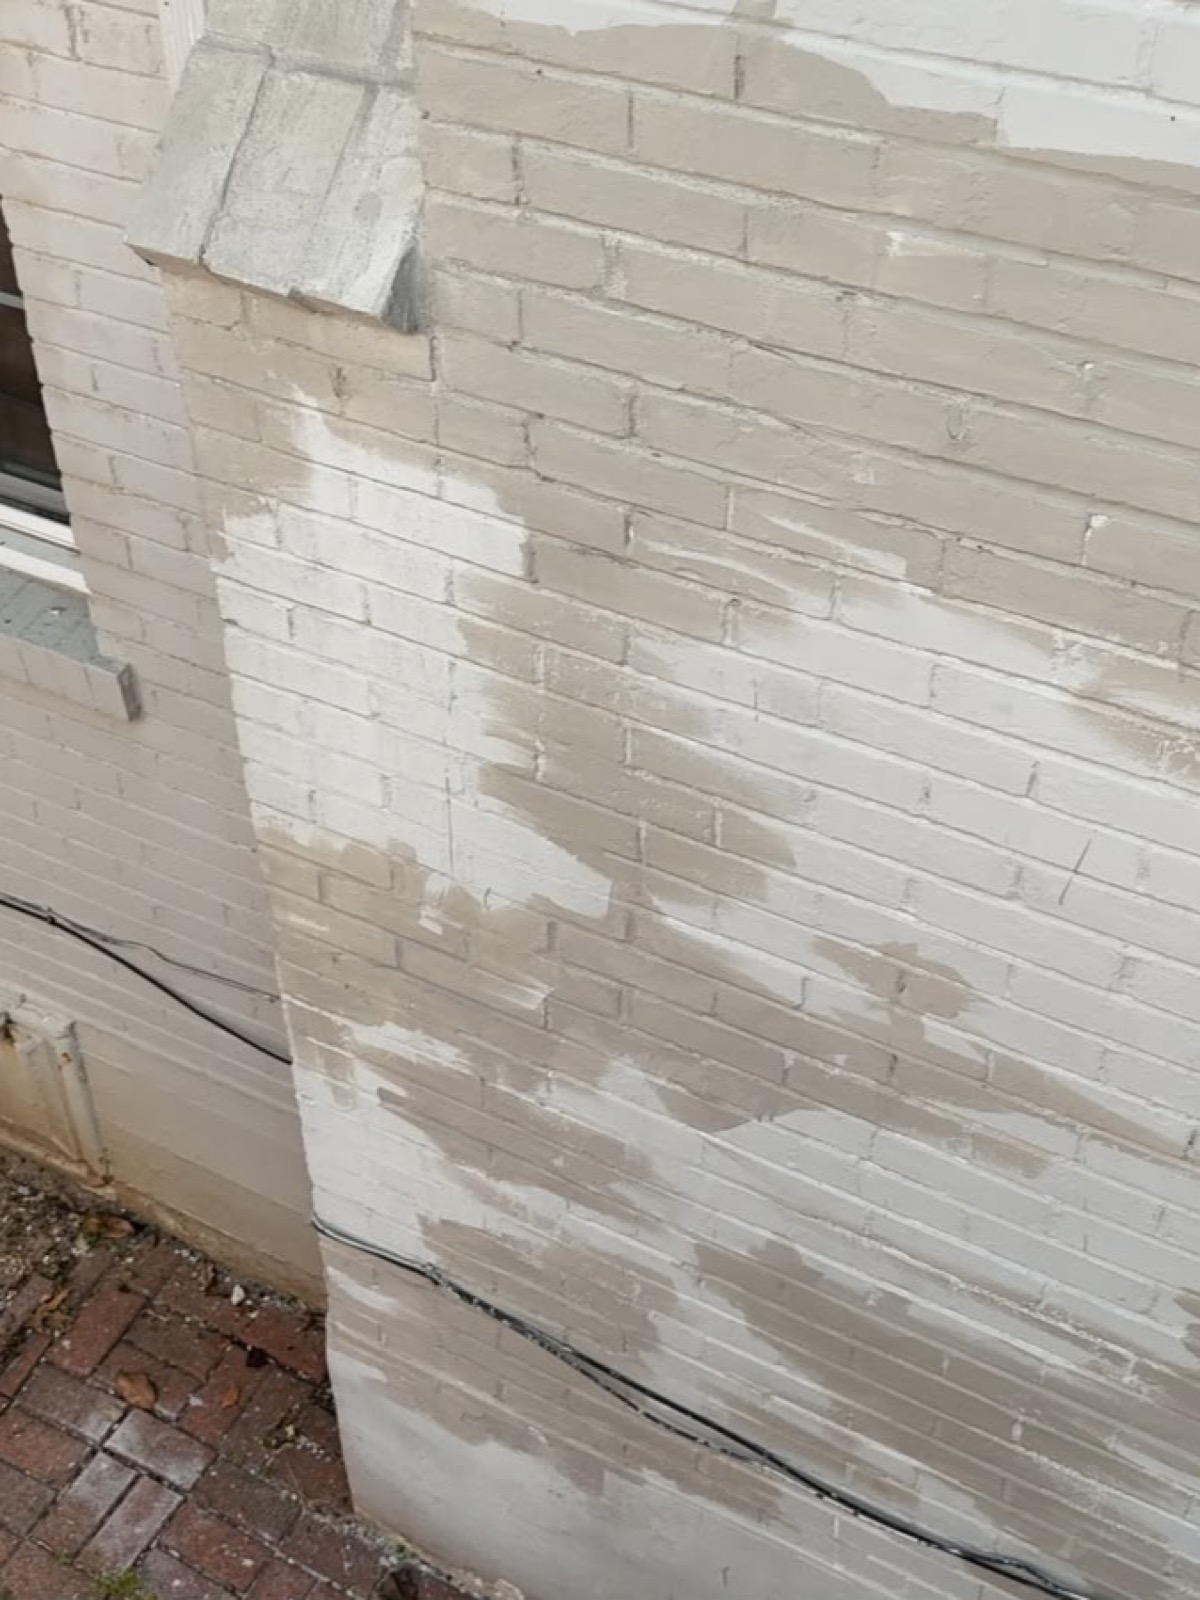
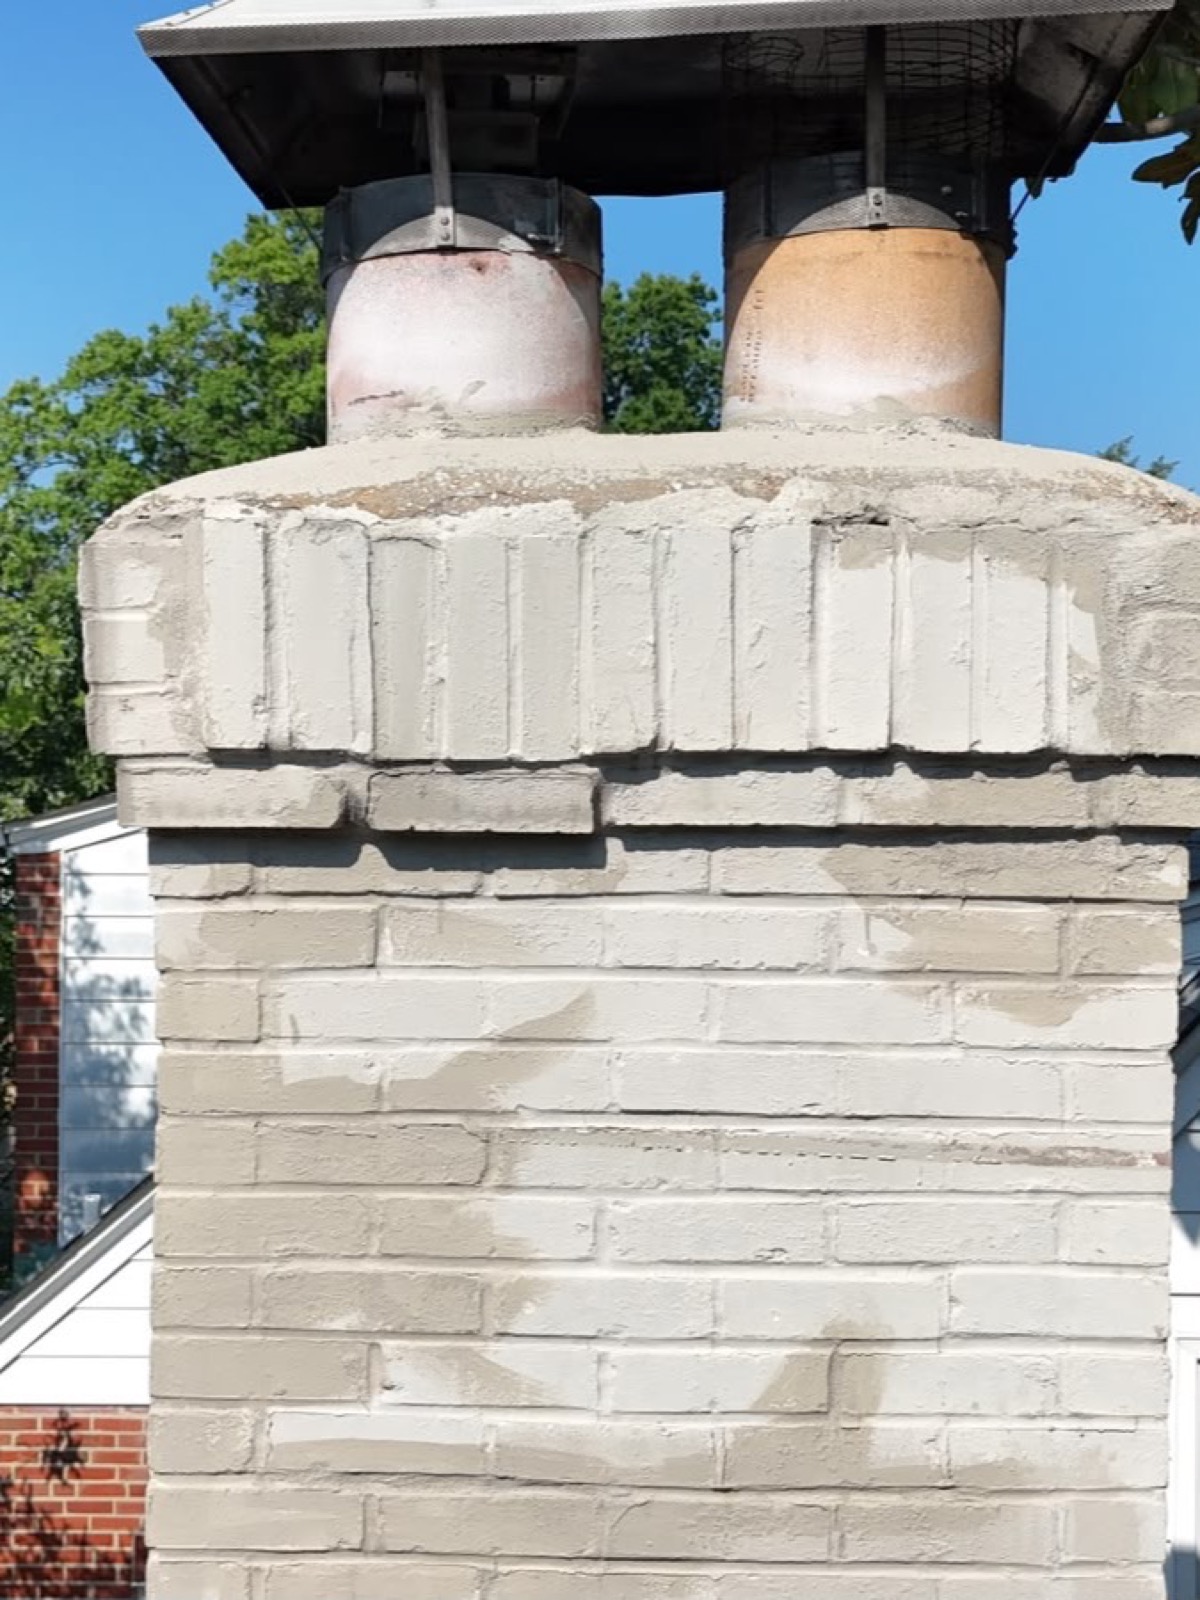
By the time we got there the chimney had been repaired in pieces more than once, and then painted. Under the paint were patches in several different mortars, cracked and split brick, and joints that had never been cut out and replaced. The top of the chimney was past the point where patching one more area was going to fix anything.
So we priced the work the chimney actually needed: take the bad rows of brick off the top and rebuild them, replace the cracked flue tiles, cut out and repoint every joint, and pour a proper crown.
Why Paint Over a Repair Is a Warning Sign
When masonry is repaired properly there is no reason to cover it up. New brick and fresh joints look like new brick and fresh joints, and anyone can walk up and look at them. Paint over a repair does one thing: it hides the joints, the patch material and the colour differences, so nobody can tell from the ground what was actually done.
That is what the paint was doing here. Underneath it were repairs done at different times with different materials, along with cracked brick and dead joints that had never been touched.
What We Found
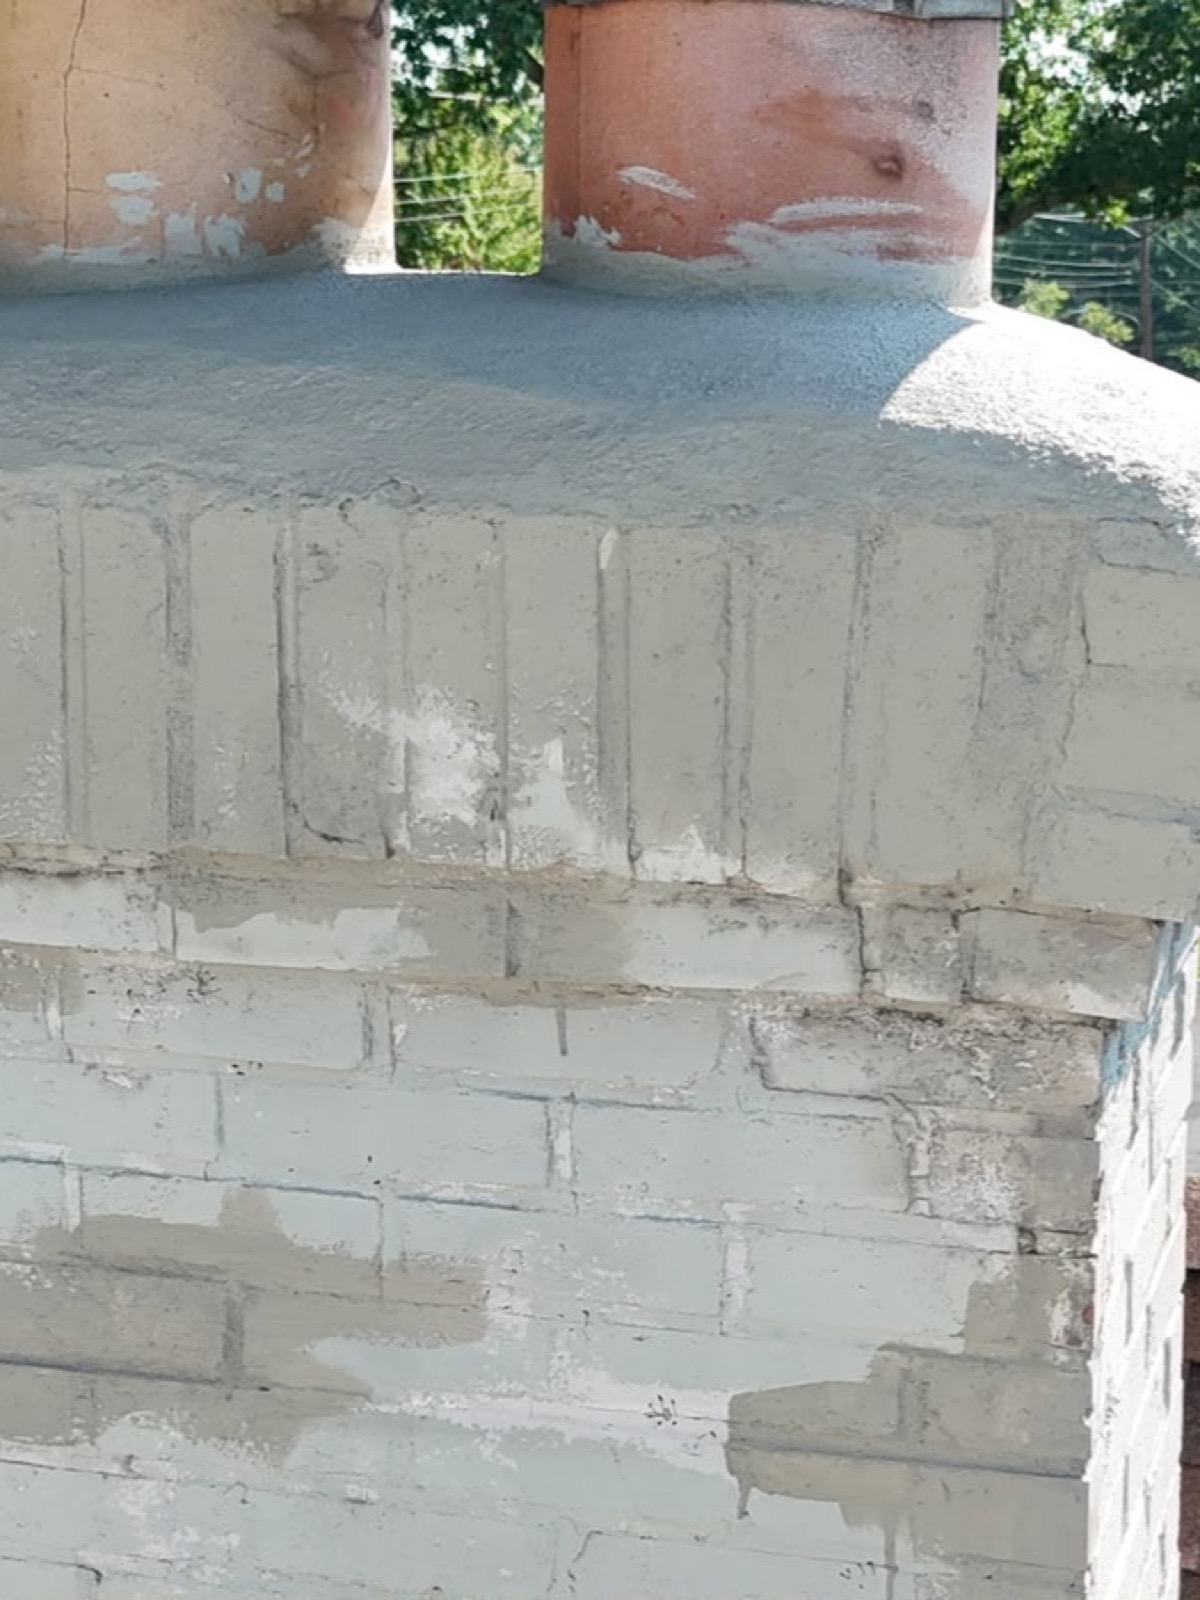
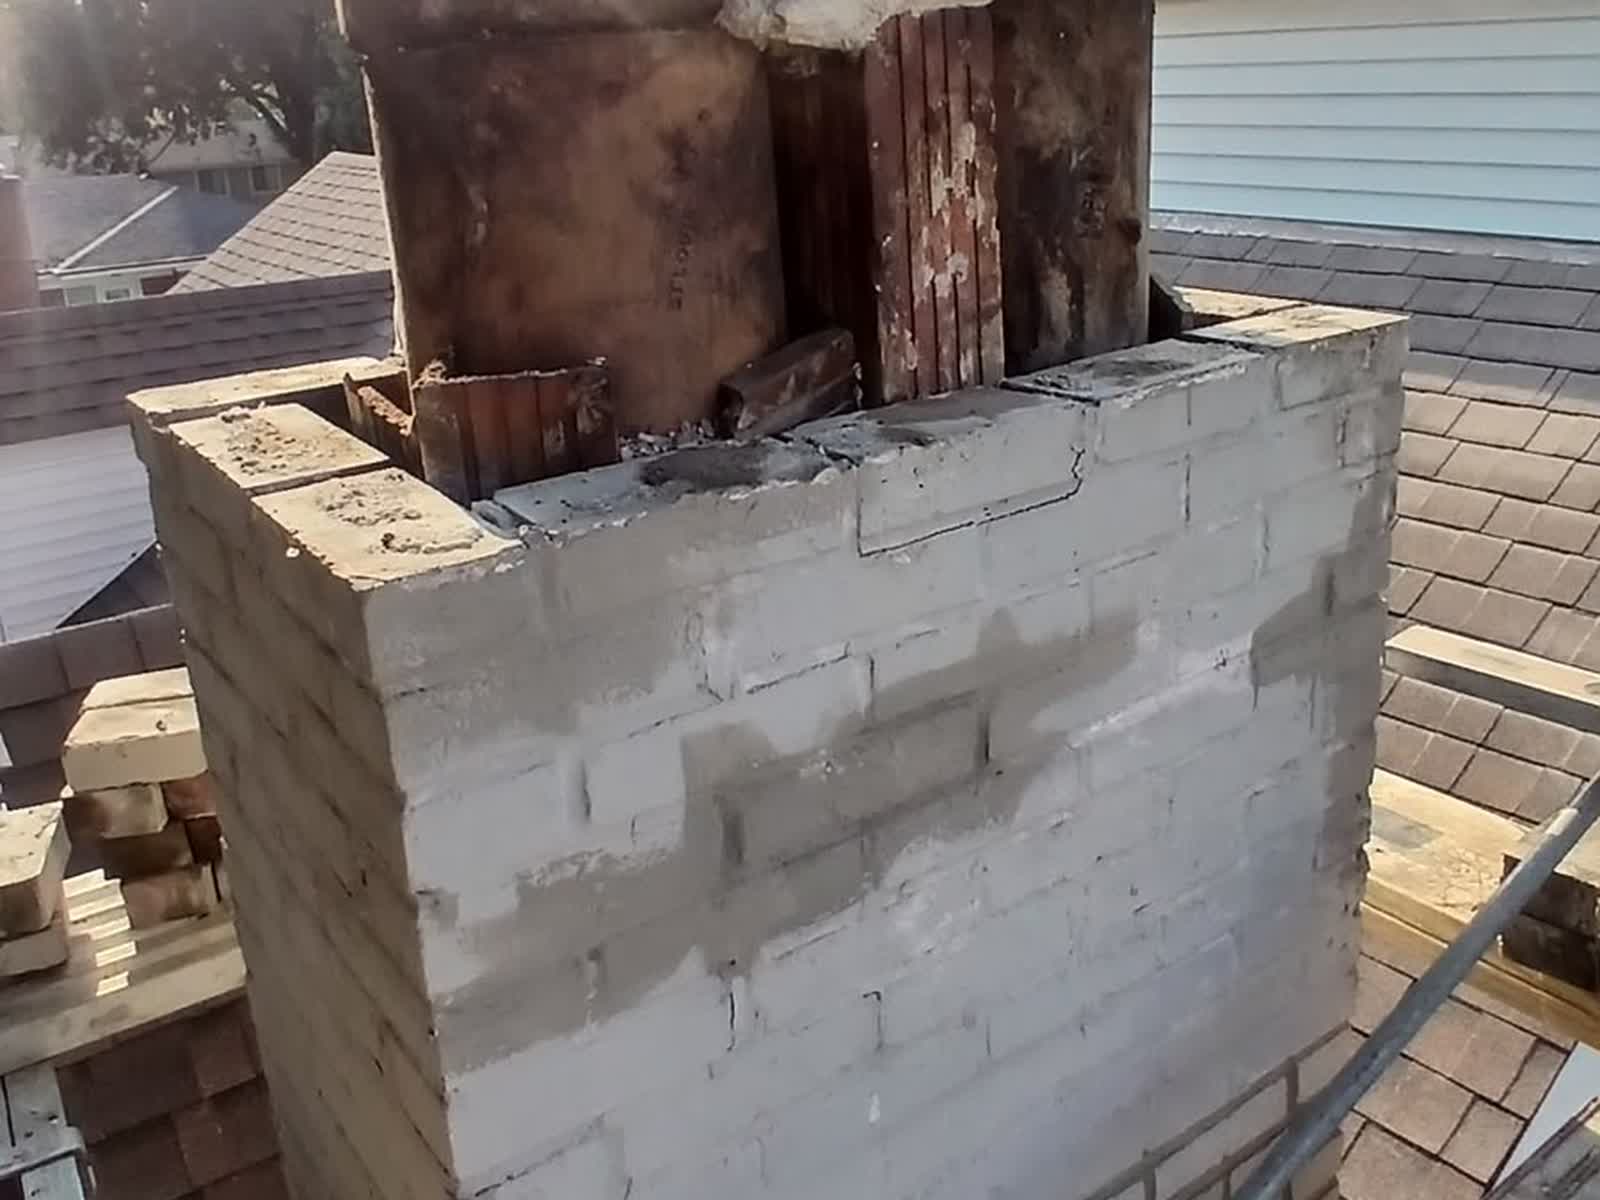
- A soldier stack at the top, the bricks standing vertical in a single row, pulling apart and opening outward at the corners
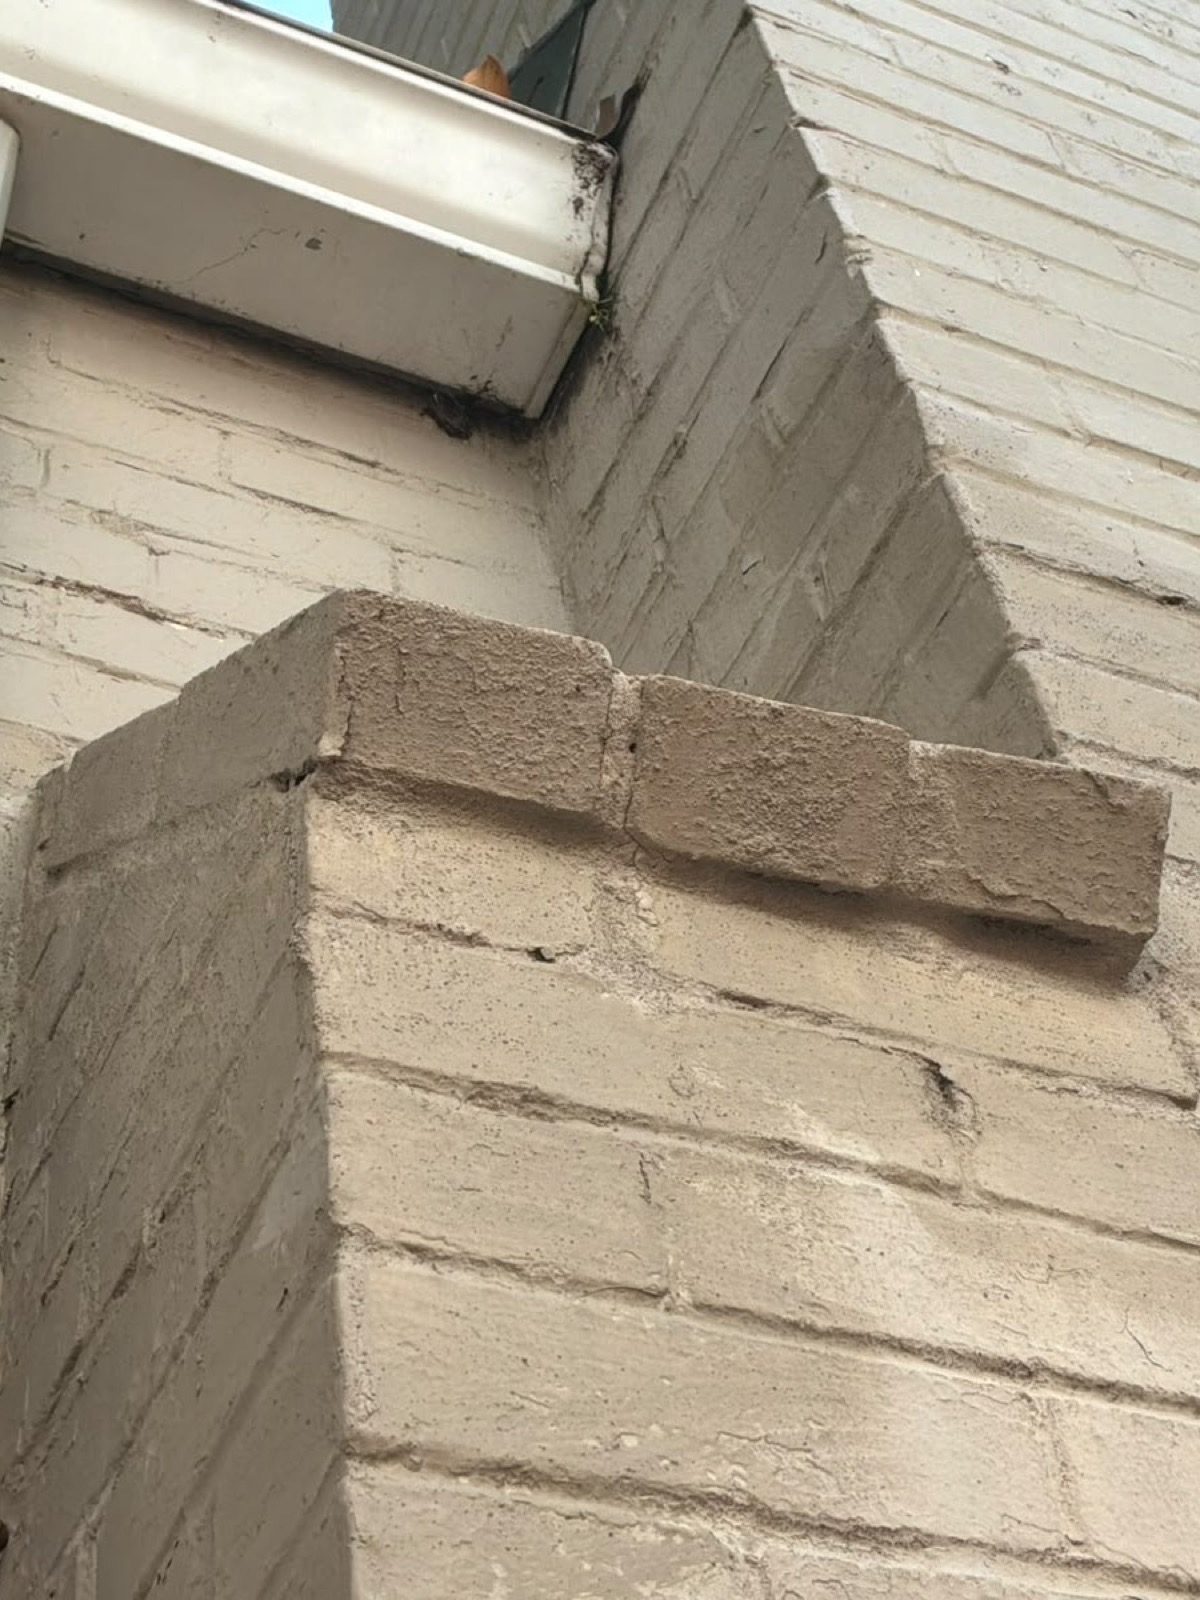
- Cracked and split brick in several places, with one corner visibly out of line
- Dead mortar joints throughout, with patch material smeared over them instead of the joints being cut out and replaced
- A crown that was a low slope of concrete with no height to it, no overhang and no drip edge, finished off with a coat of sealant
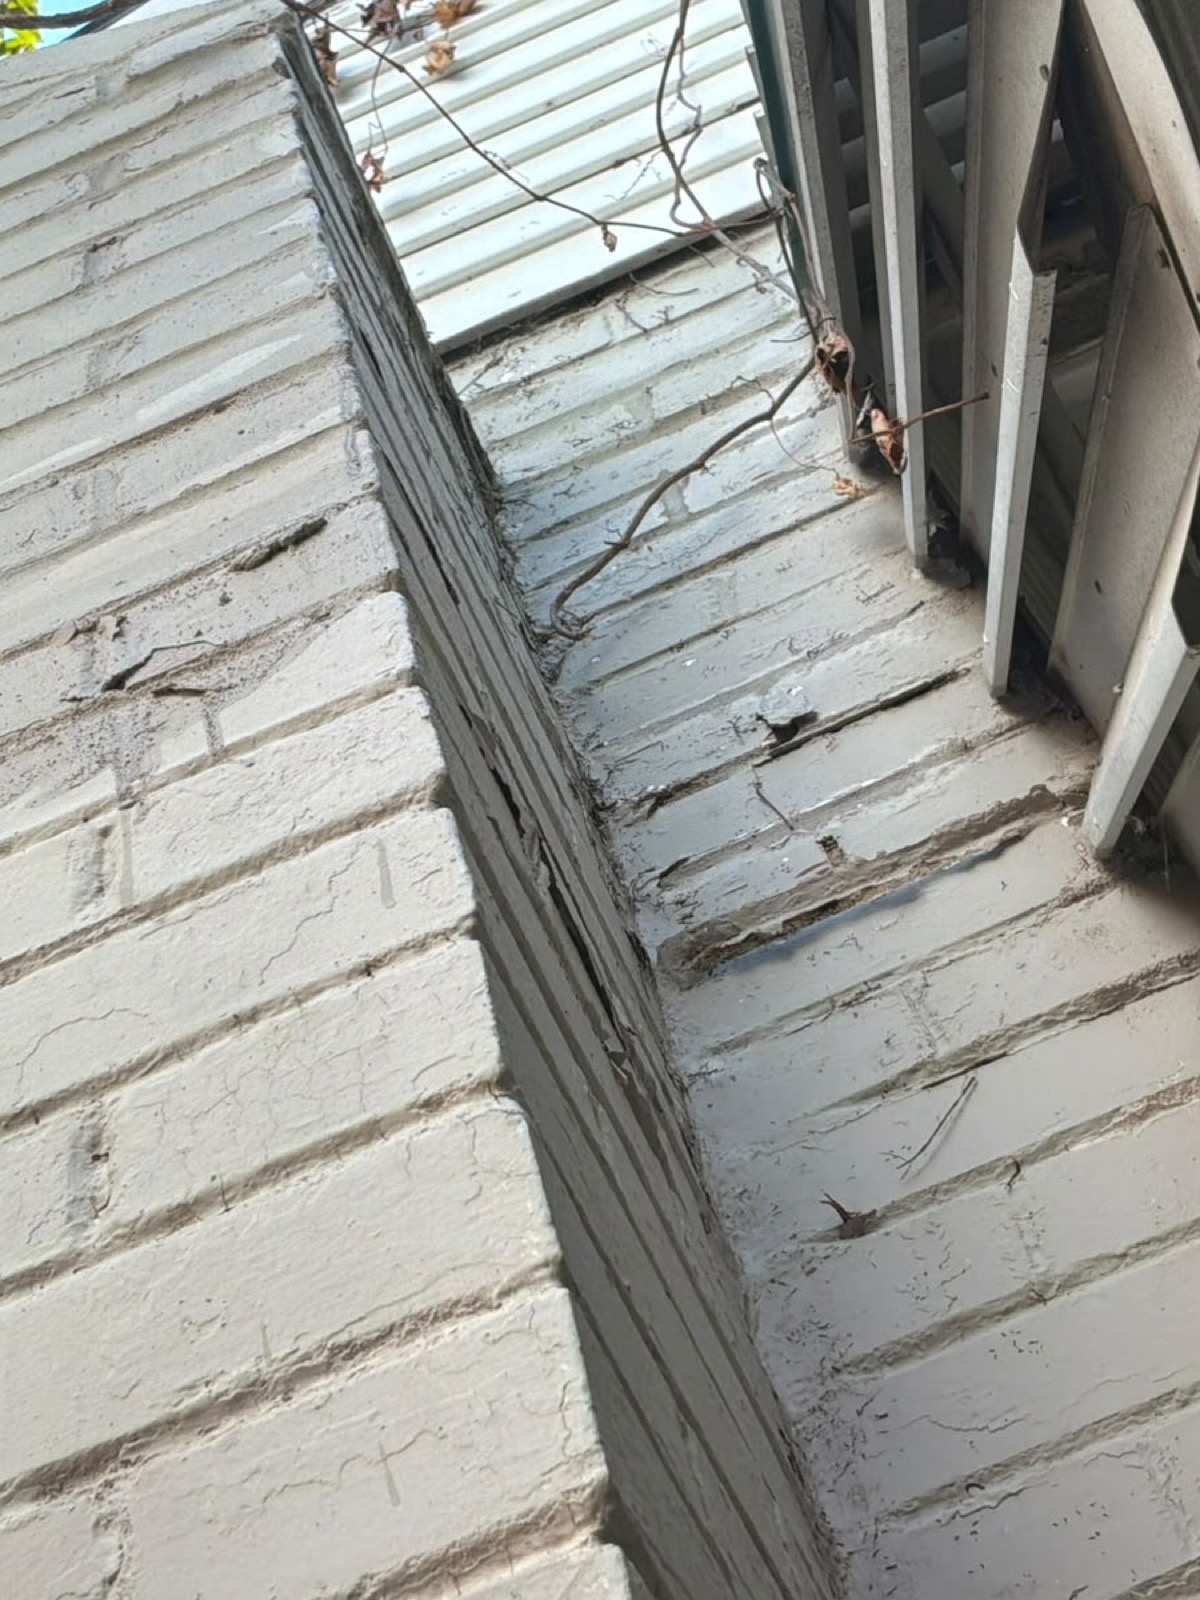
- Open and cracked joints through the stepped shoulders below the gutter
- Cracked and open flue tiles at the top
- Different colours across the chimney from repairs done at different times, all hidden under the paint
Water Returning After a Previous Repair?
We will inspect the masonry, photograph what is actually there, and tell you what the repair really needs.
Why It Needed a Rebuild
Repairing a section works when the brick around it is still sound and the damage is limited. That was not this chimney. The joints had gone throughout, the brick at the top was no longer holding together, and the previous repairs had been laid over the failures instead of replacing them.
Patching one more area would have left all of that in place, and going by the history of this chimney it would have leaked again. Taking the bad material out and rebuilding from sound brick fixes it instead of hiding it.
We went through the photos with the homeowner and showed him what was under the paint before anything was scheduled.
Getting to the Chimney Safely
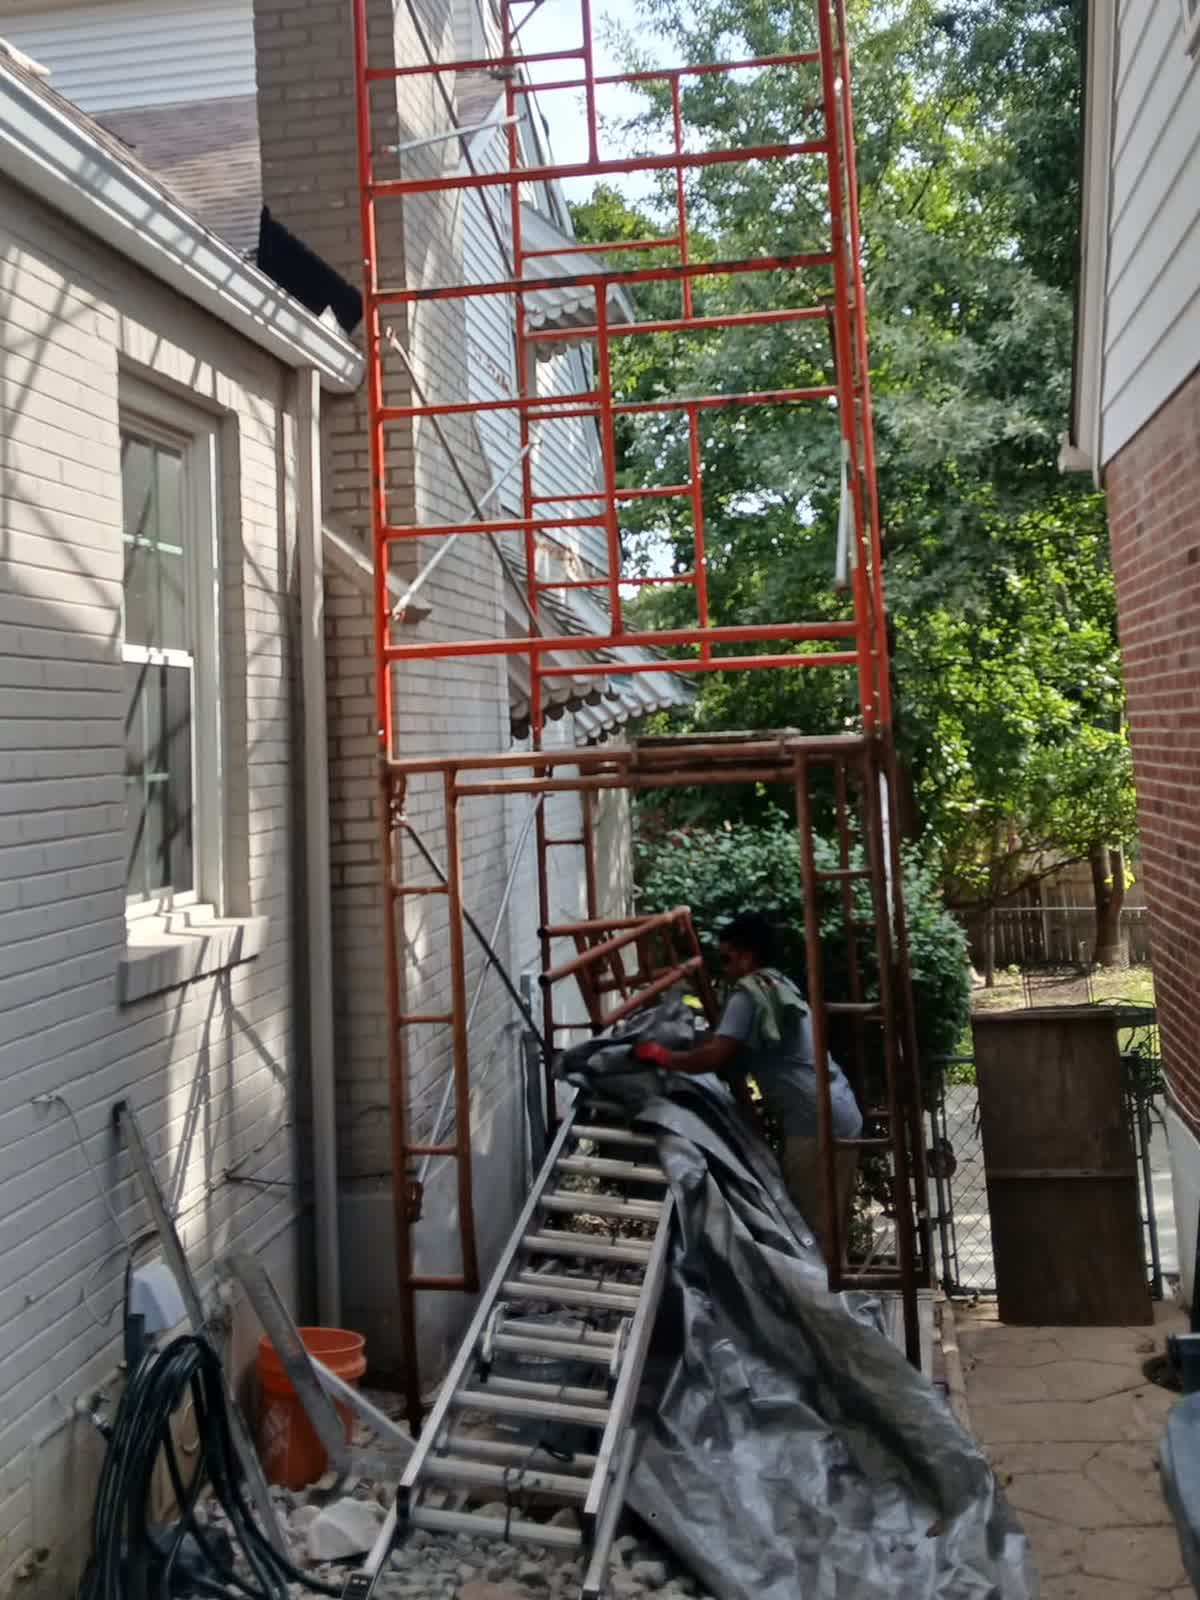
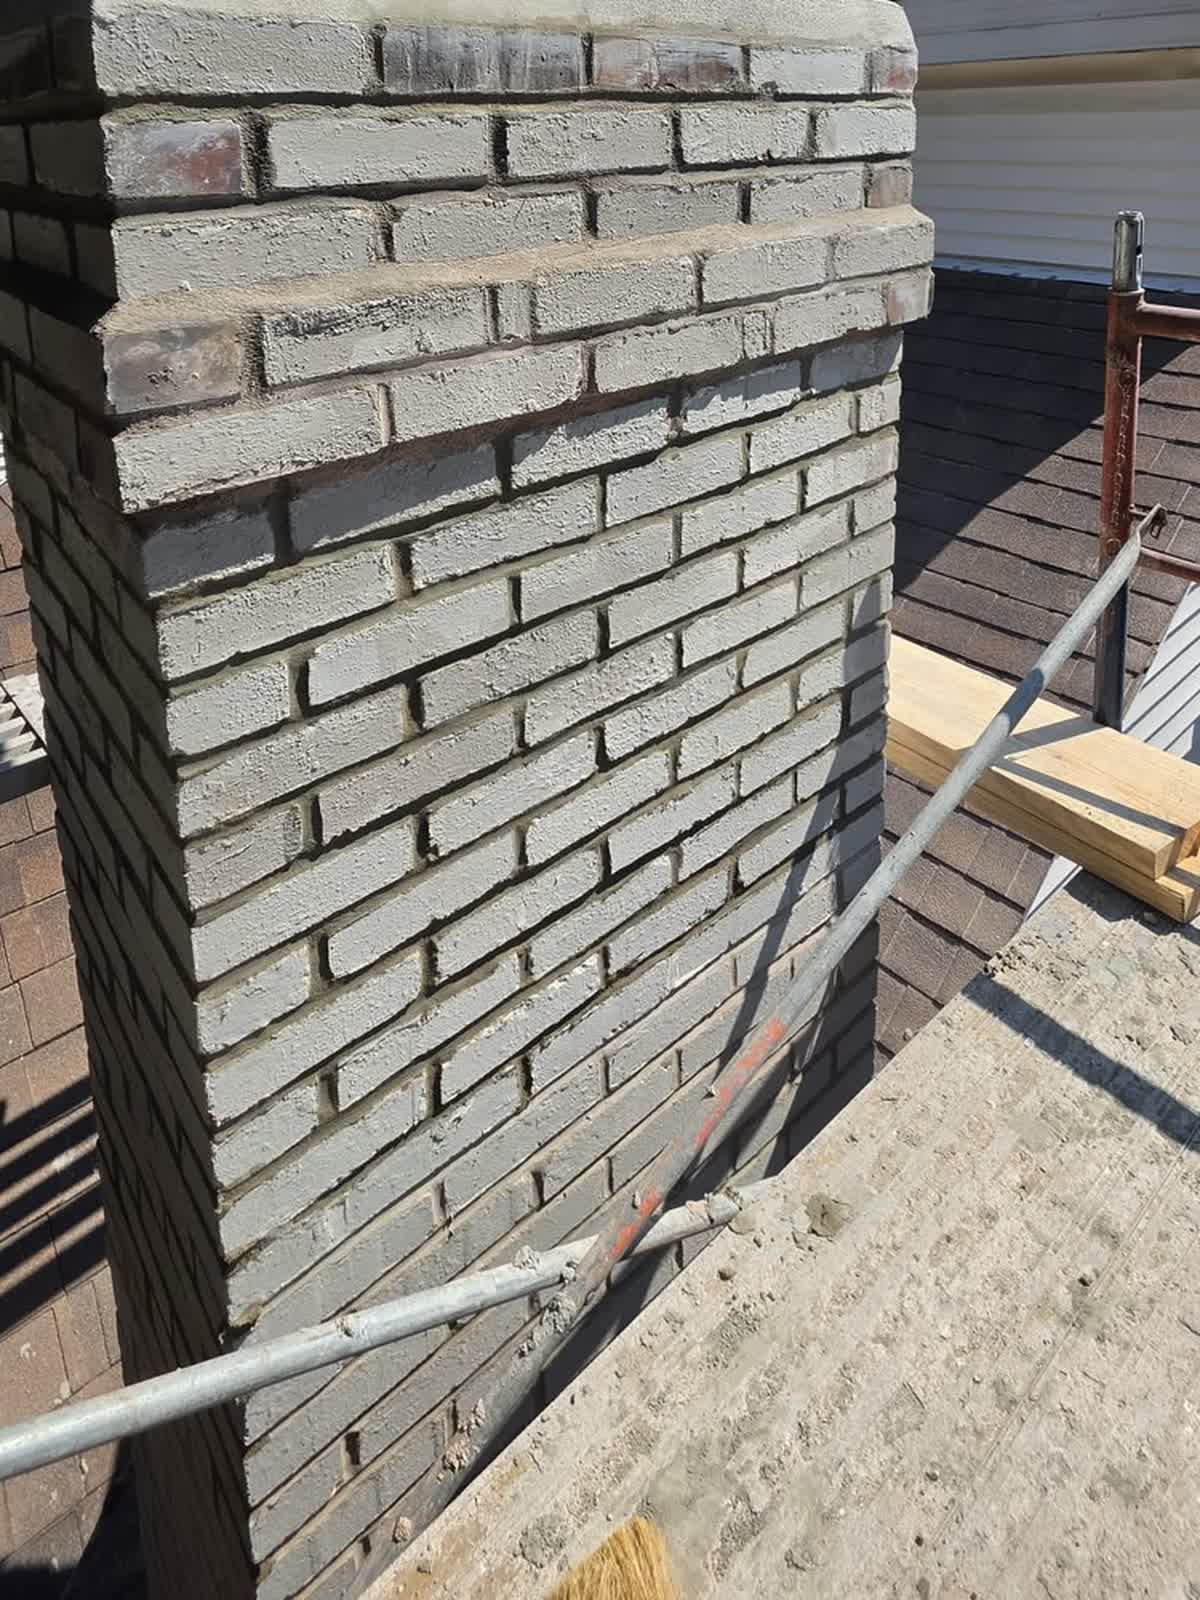
The chimney sits in a narrow side yard between two houses, which is no place to rebuild a chimney off a ladder. Scaffolding was built and braced the full height, with a bridge across the roof slope so the top could be reached and worked on safely. The neighbours were told in advance that we would be working along the property line.
Cutting the Old Mortar Out
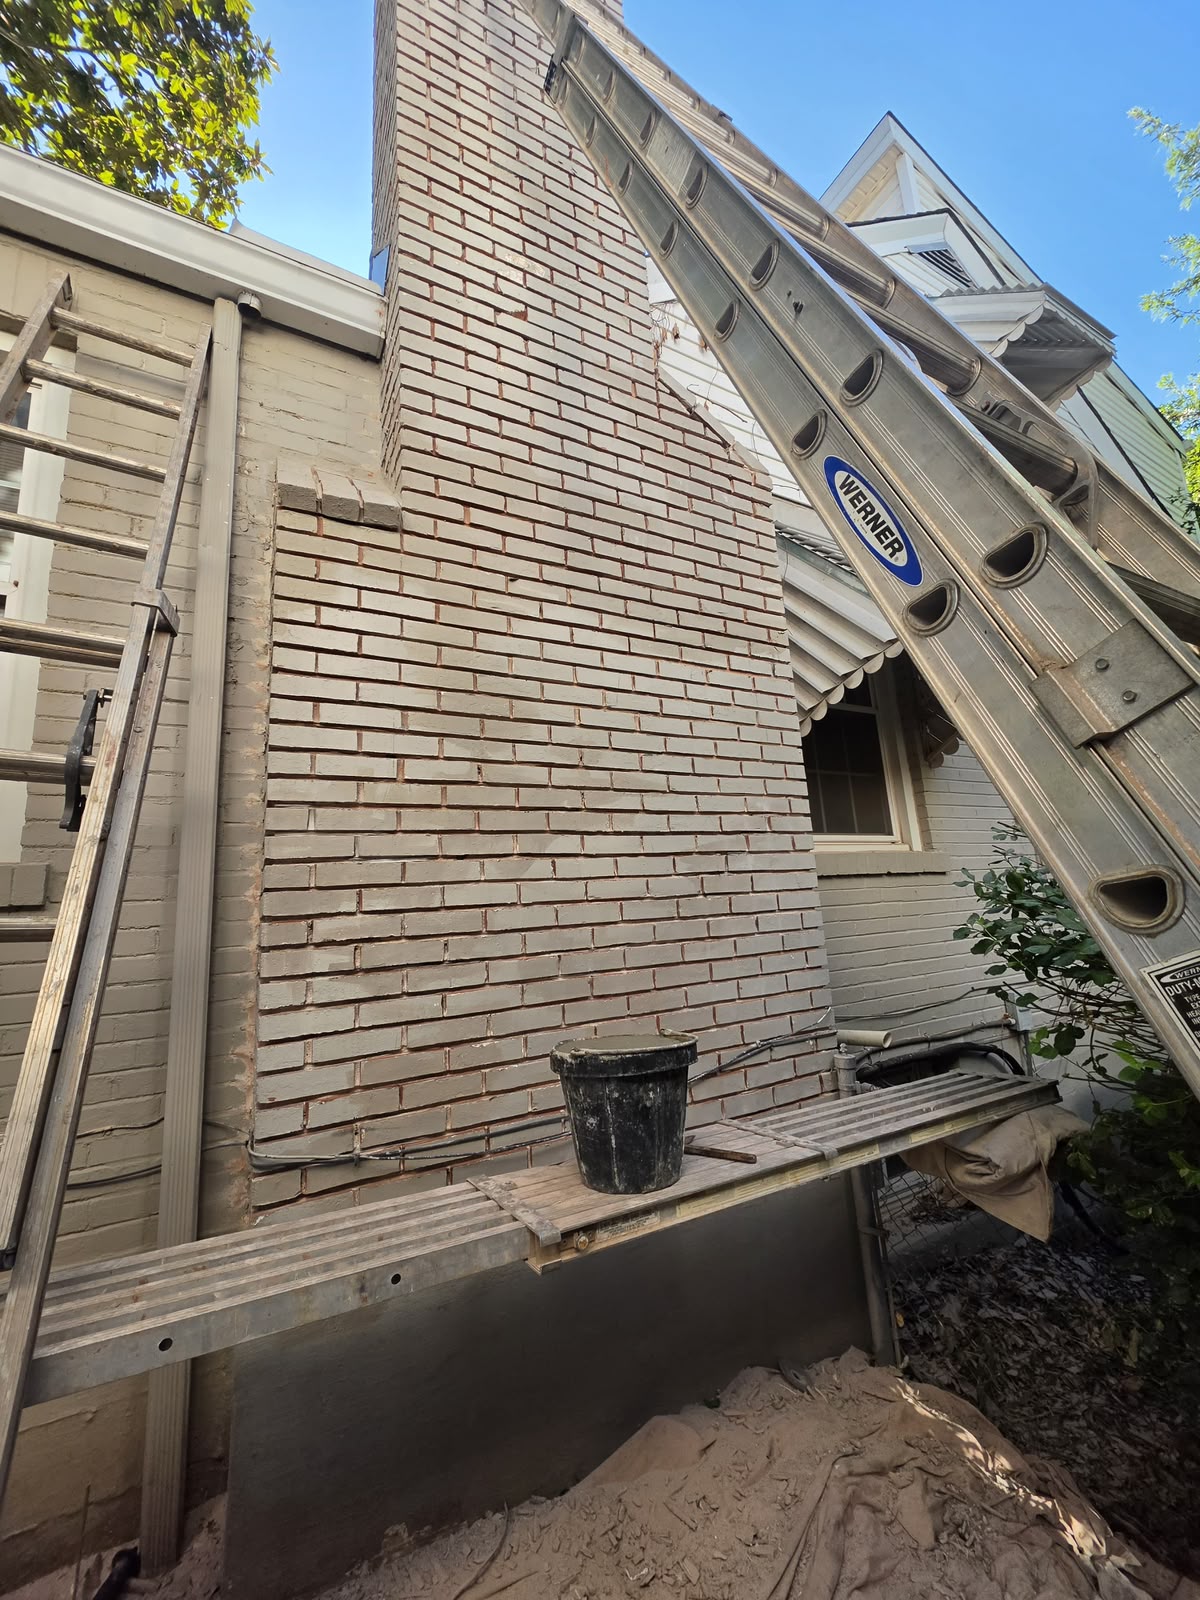
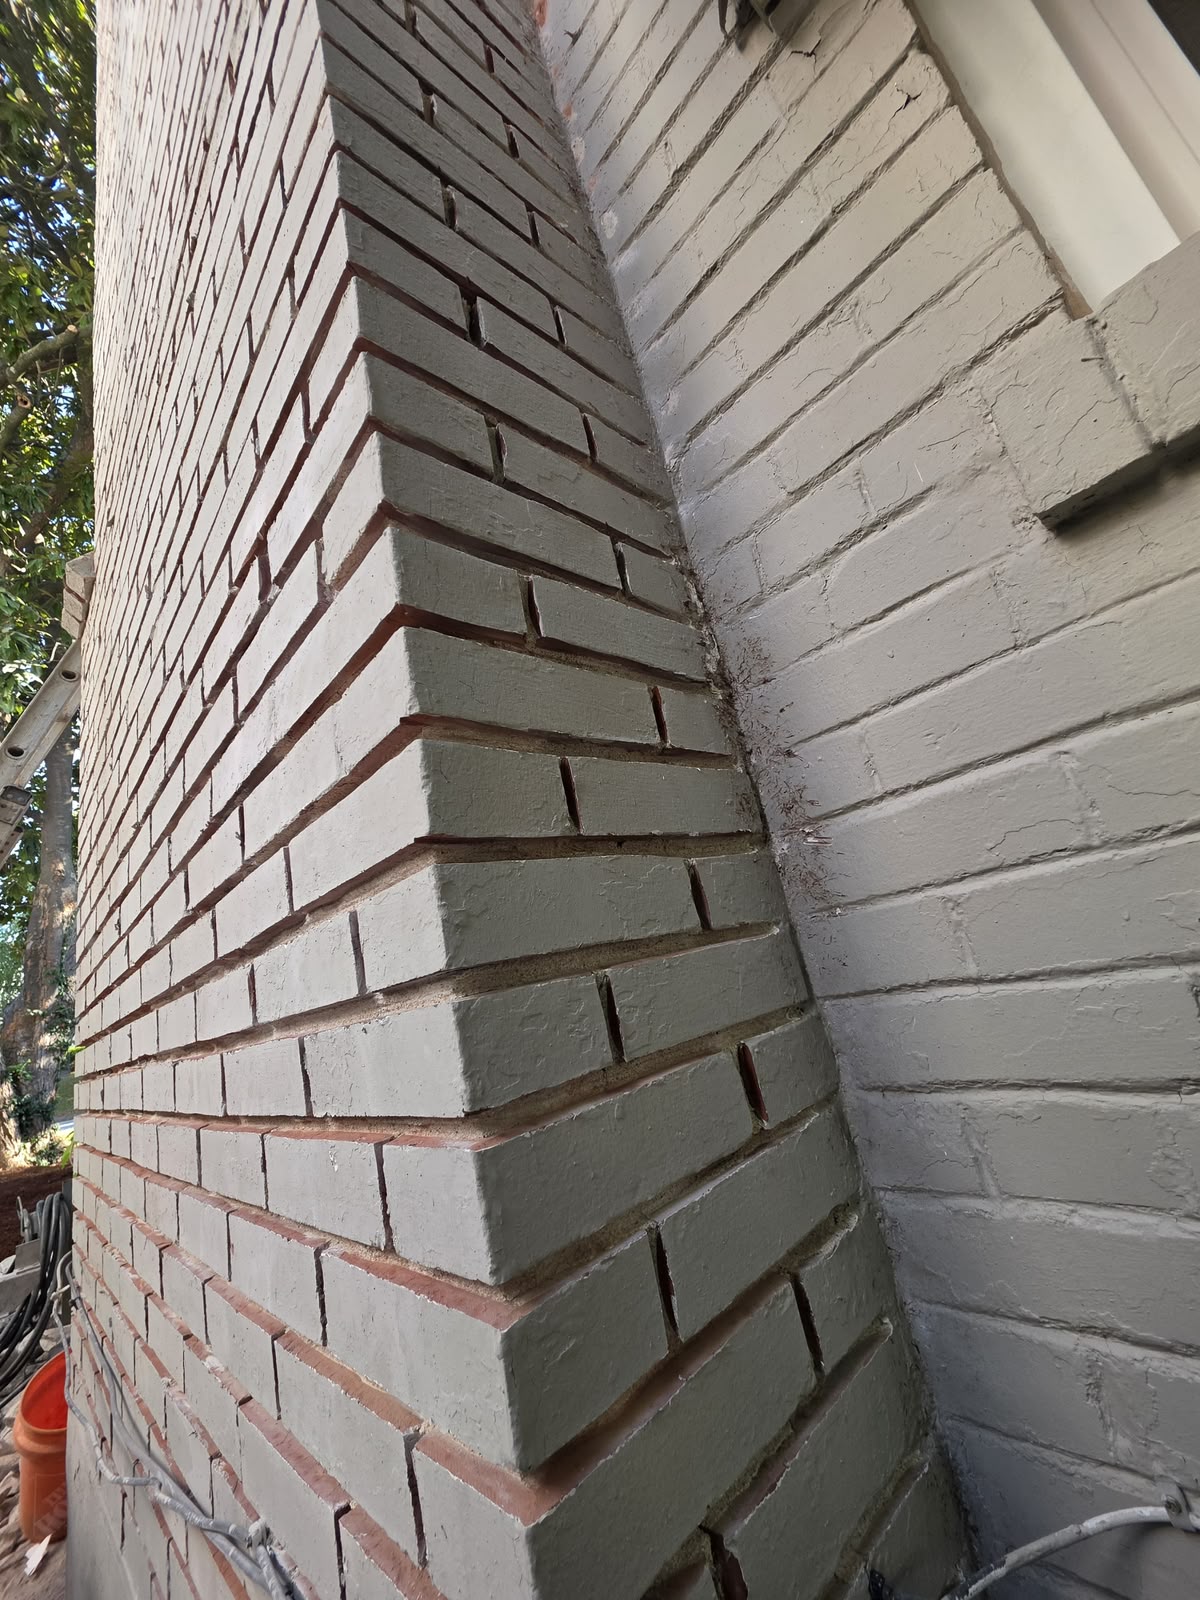
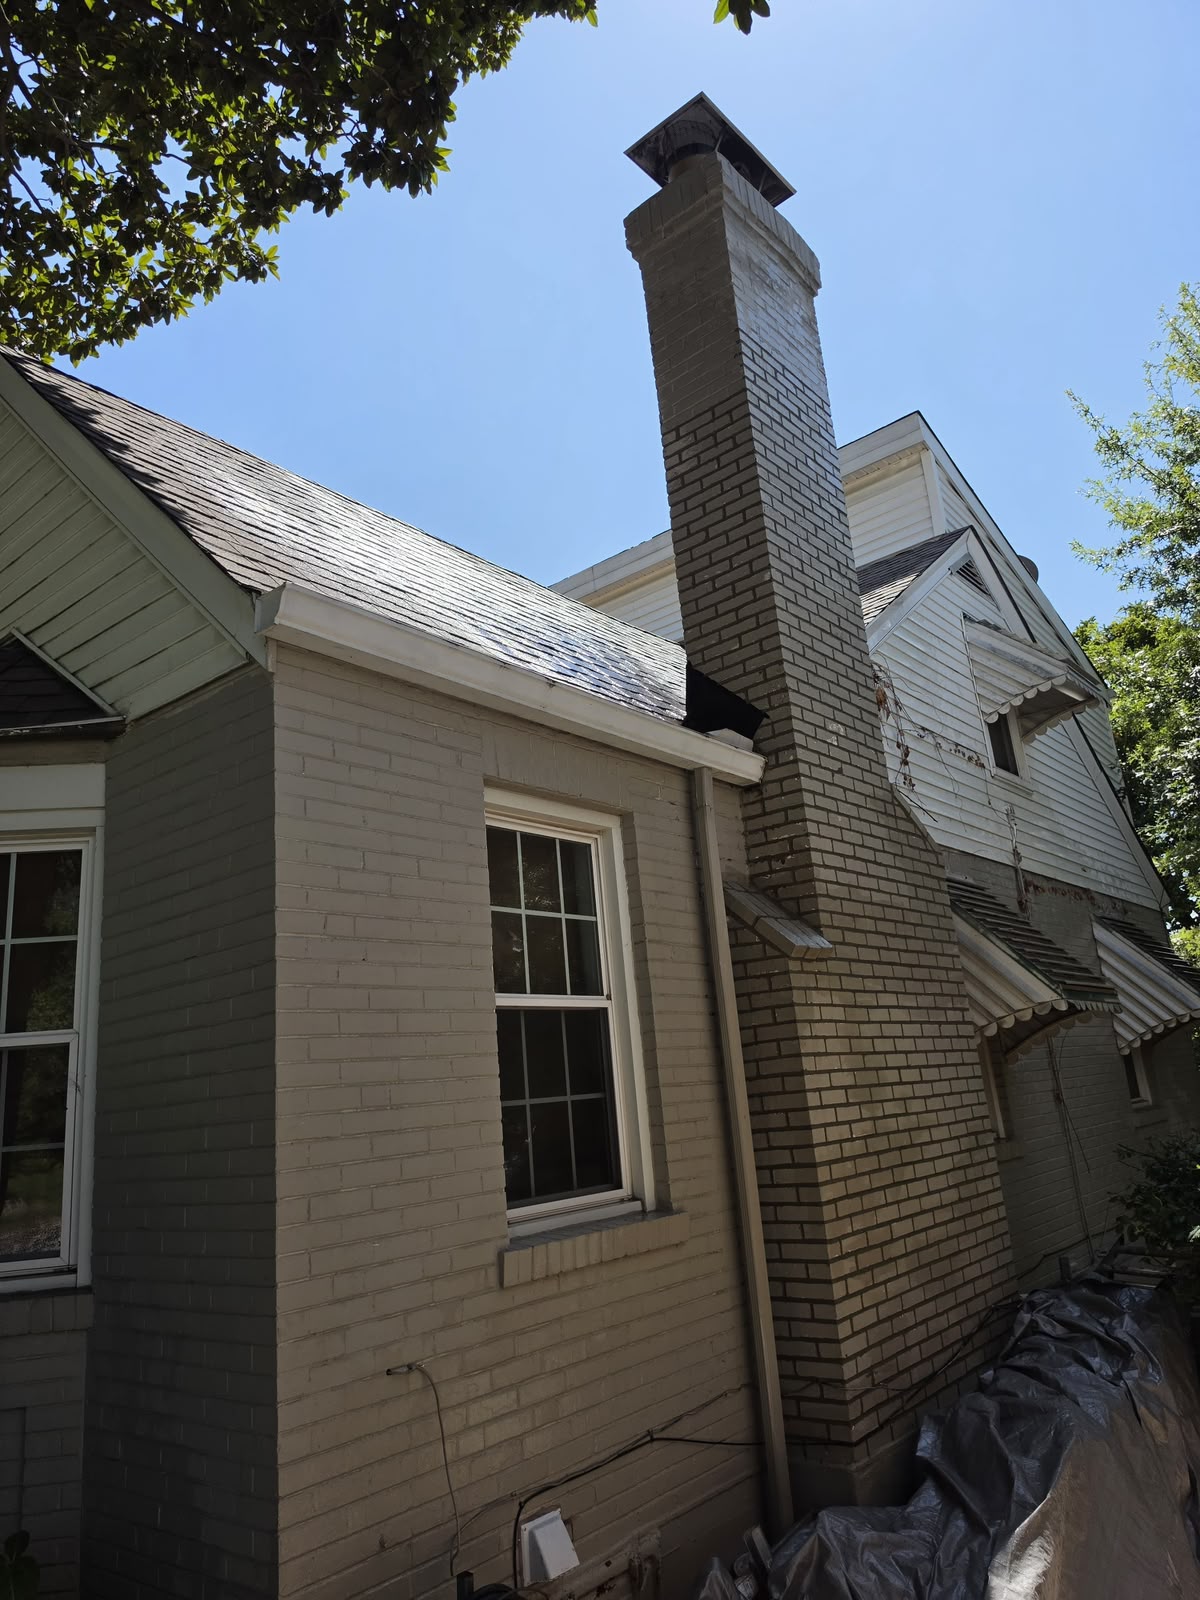
Replacing the mortar starts with getting the old mortar out. Every joint was cut out to depth, across the faces, the corners and the stepped shoulders, instead of new mortar being smeared over the old joints. Cutting them out first gives the new mortar somewhere to grip. Smeared over an old joint, it has nothing to hold on to.
Taking the Top Down
The top four rows of brick came off, down to solid brick. With the brickwork off, the flue tiles underneath turned out to be cracked and open, so they were replaced before anything went back on top of them.
New Mortar Throughout
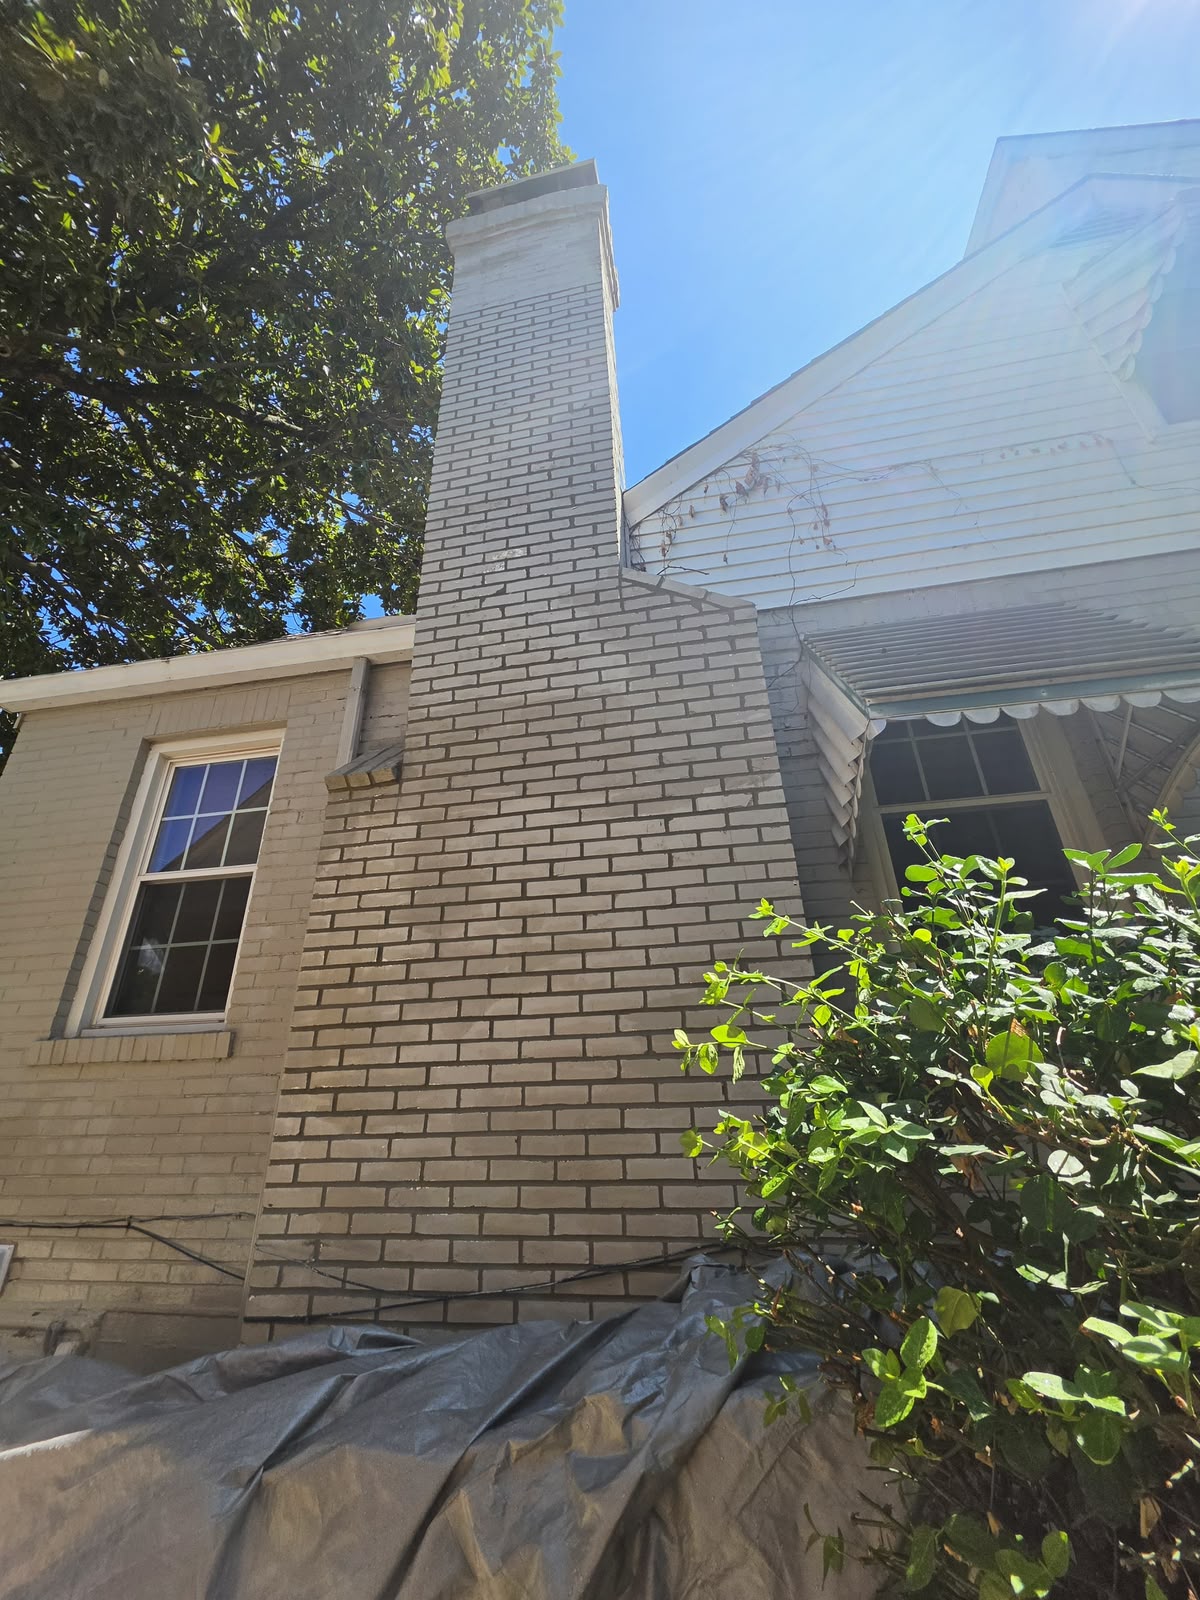
With the joints open, fresh mortar went in across the whole chimney, working up from the scaffold and then from the top platform until every joint was done.
Rebuilding the Chimney Top
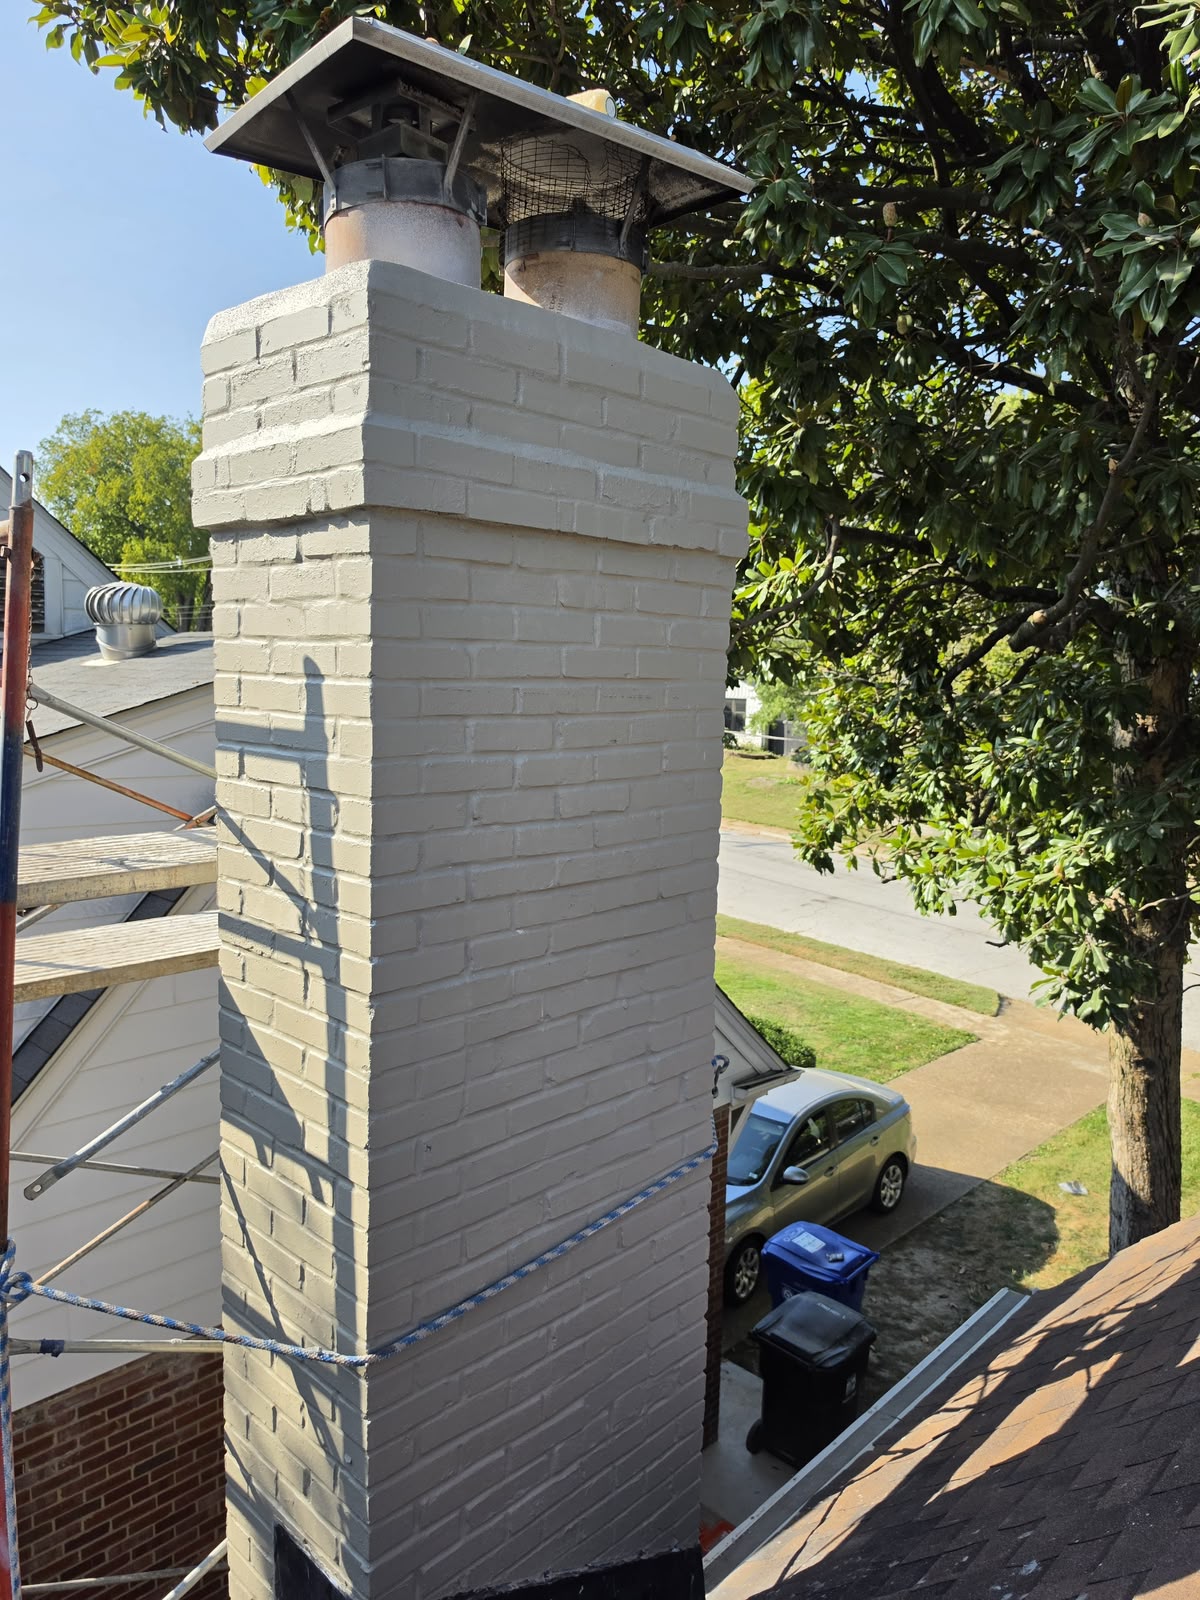
The top of this chimney was finished with a soldier stack: the bricks standing vertical, in a single row on end. It gets used because one vertical row covers the same height as three horizontal rows, so it saves brick and it saves labour. It is also the first thing to let go. Each brick is held by one joint with very little mortar under it, and the weight of the crown above pushes it apart. That is exactly what had happened here.
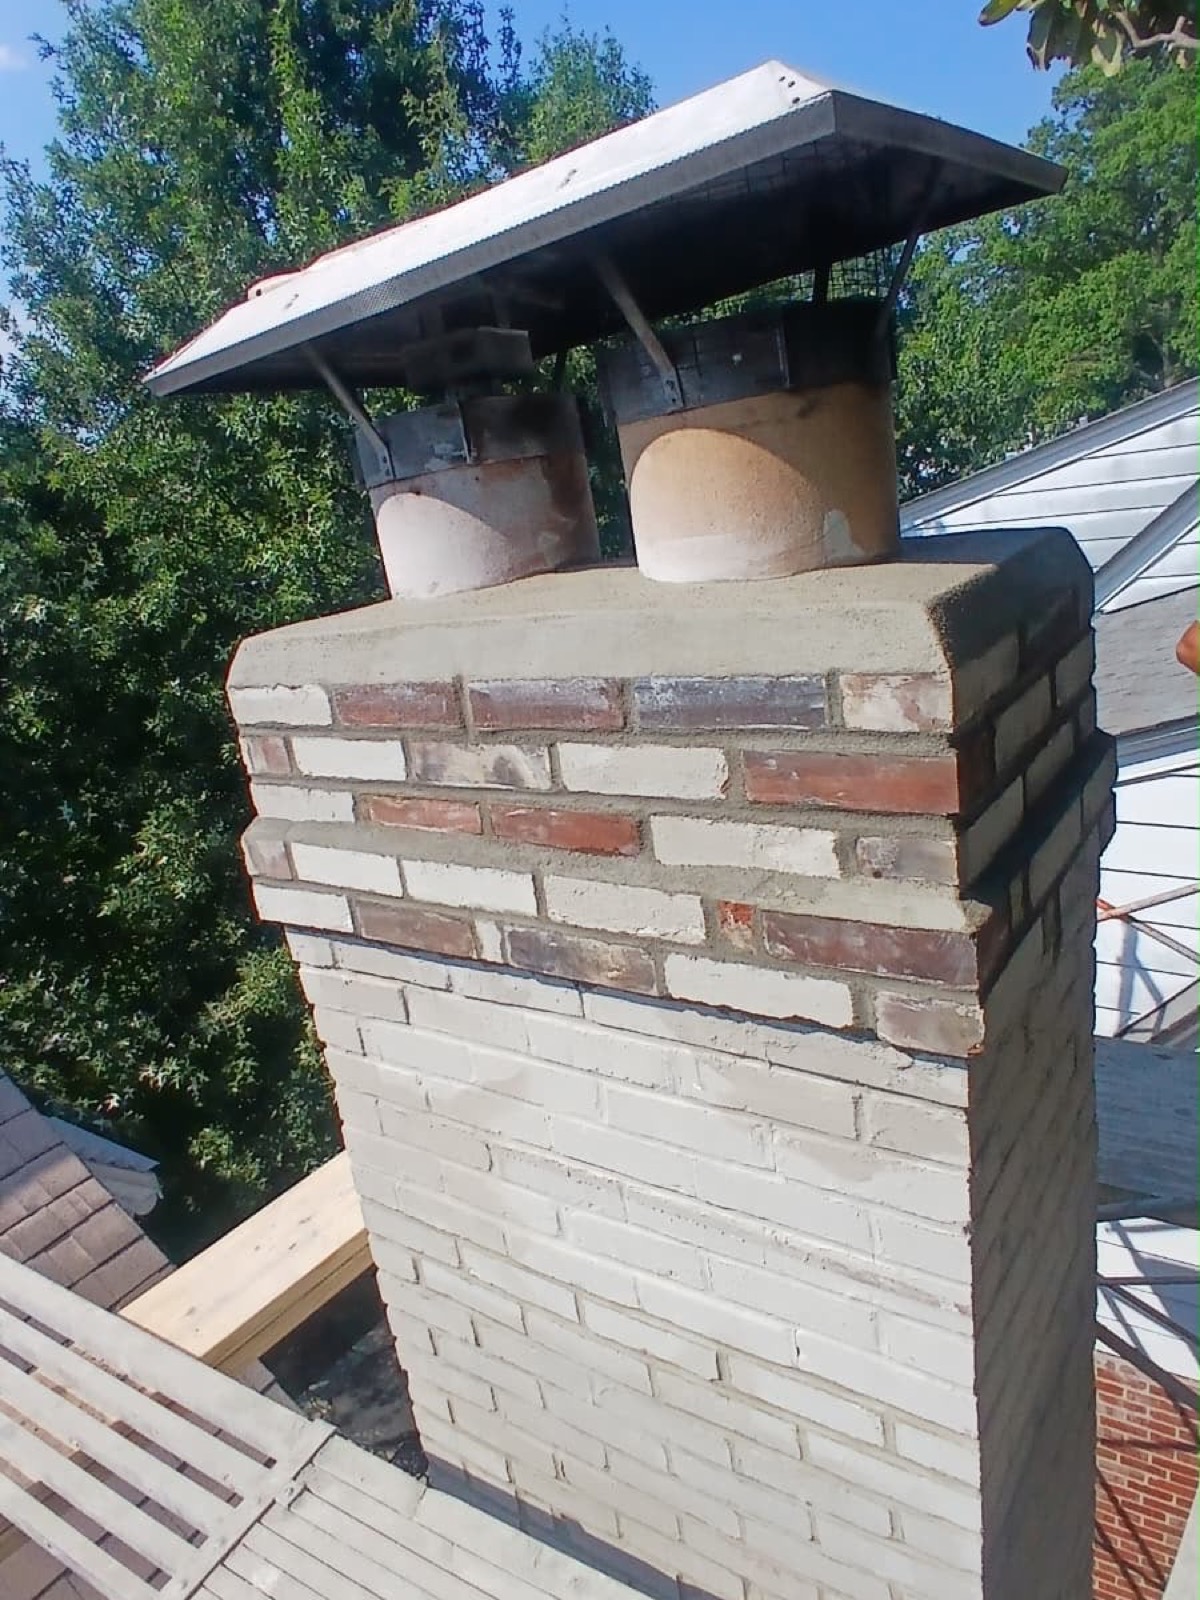
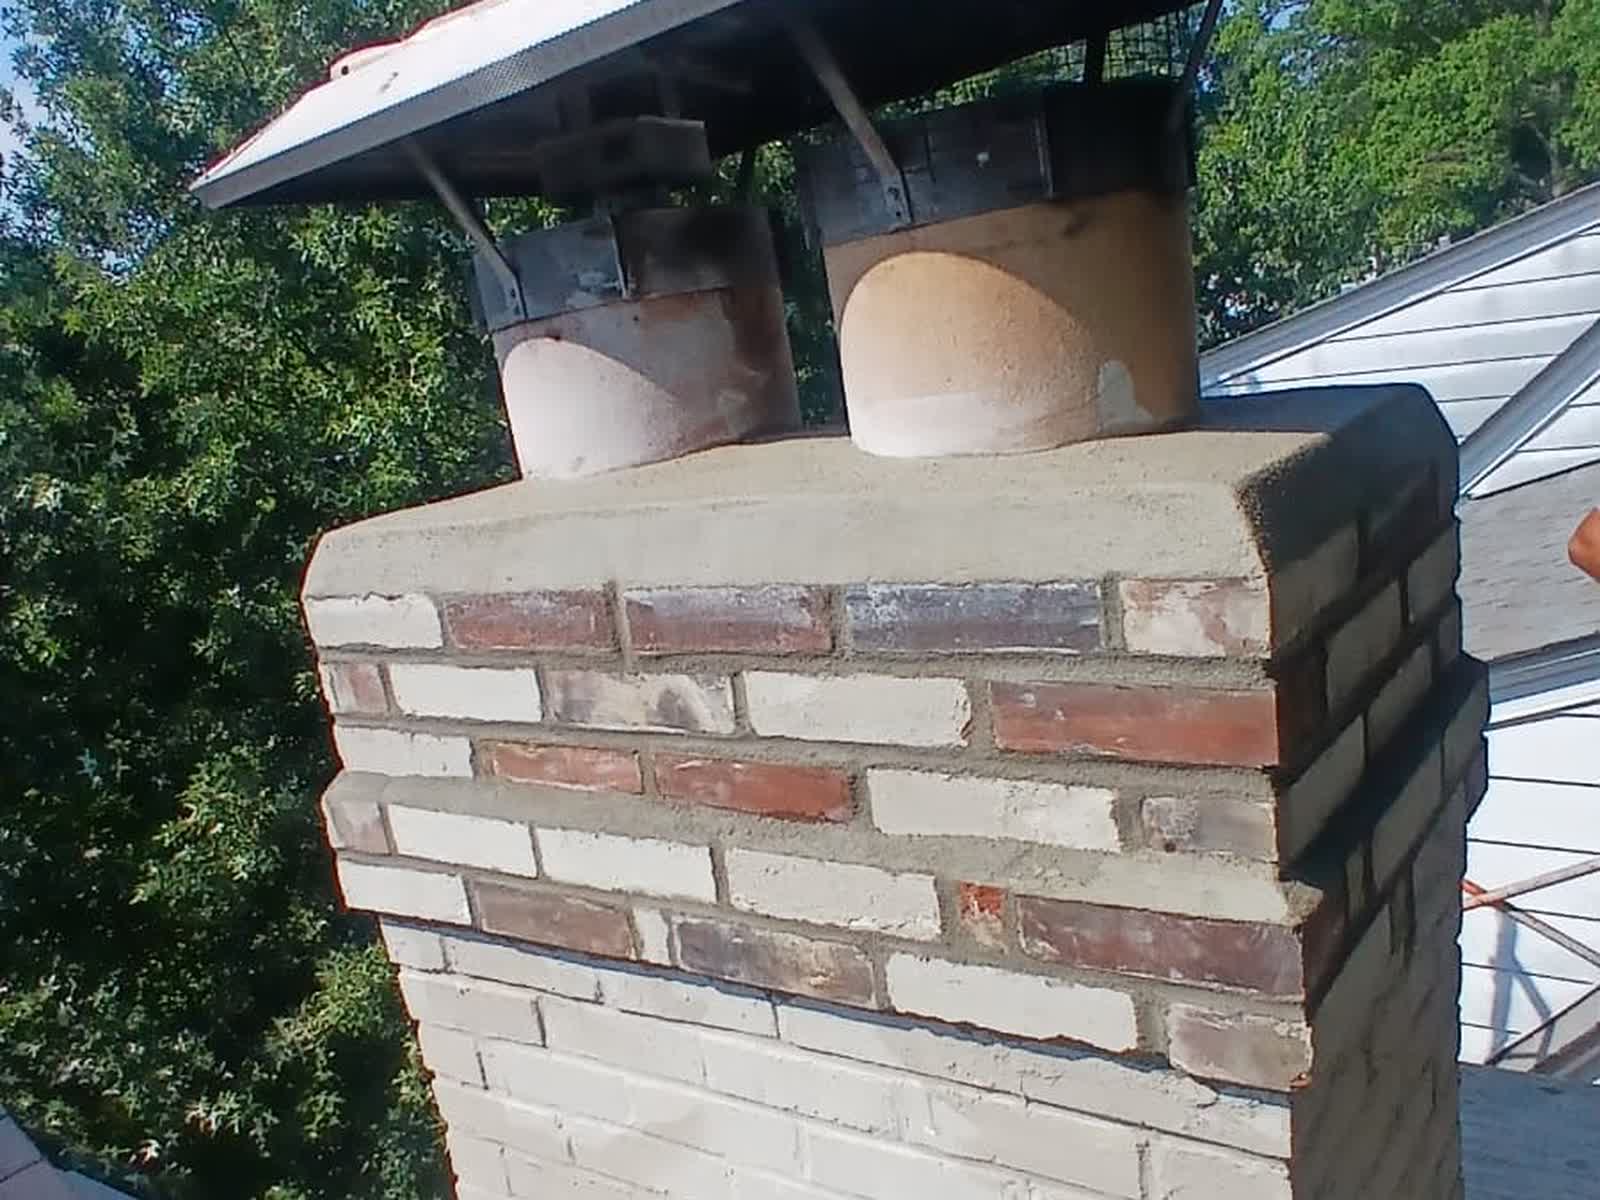
We rebuilt it horizontal. Three horizontal rows where the single vertical row had been, so the chimney is back to the same height with three times the mortar holding the top together.
The New Crown
The crown is the slab across the top of the chimney that keeps the weather off it. A crown poured flat to the edge lets the water run straight down the face of the brick, which is what the old one was doing.
The new one was poured reinforced, at proper height, overhanging the brick with a drip edge so the water is thrown clear instead of running down it.
Sealed and Painted
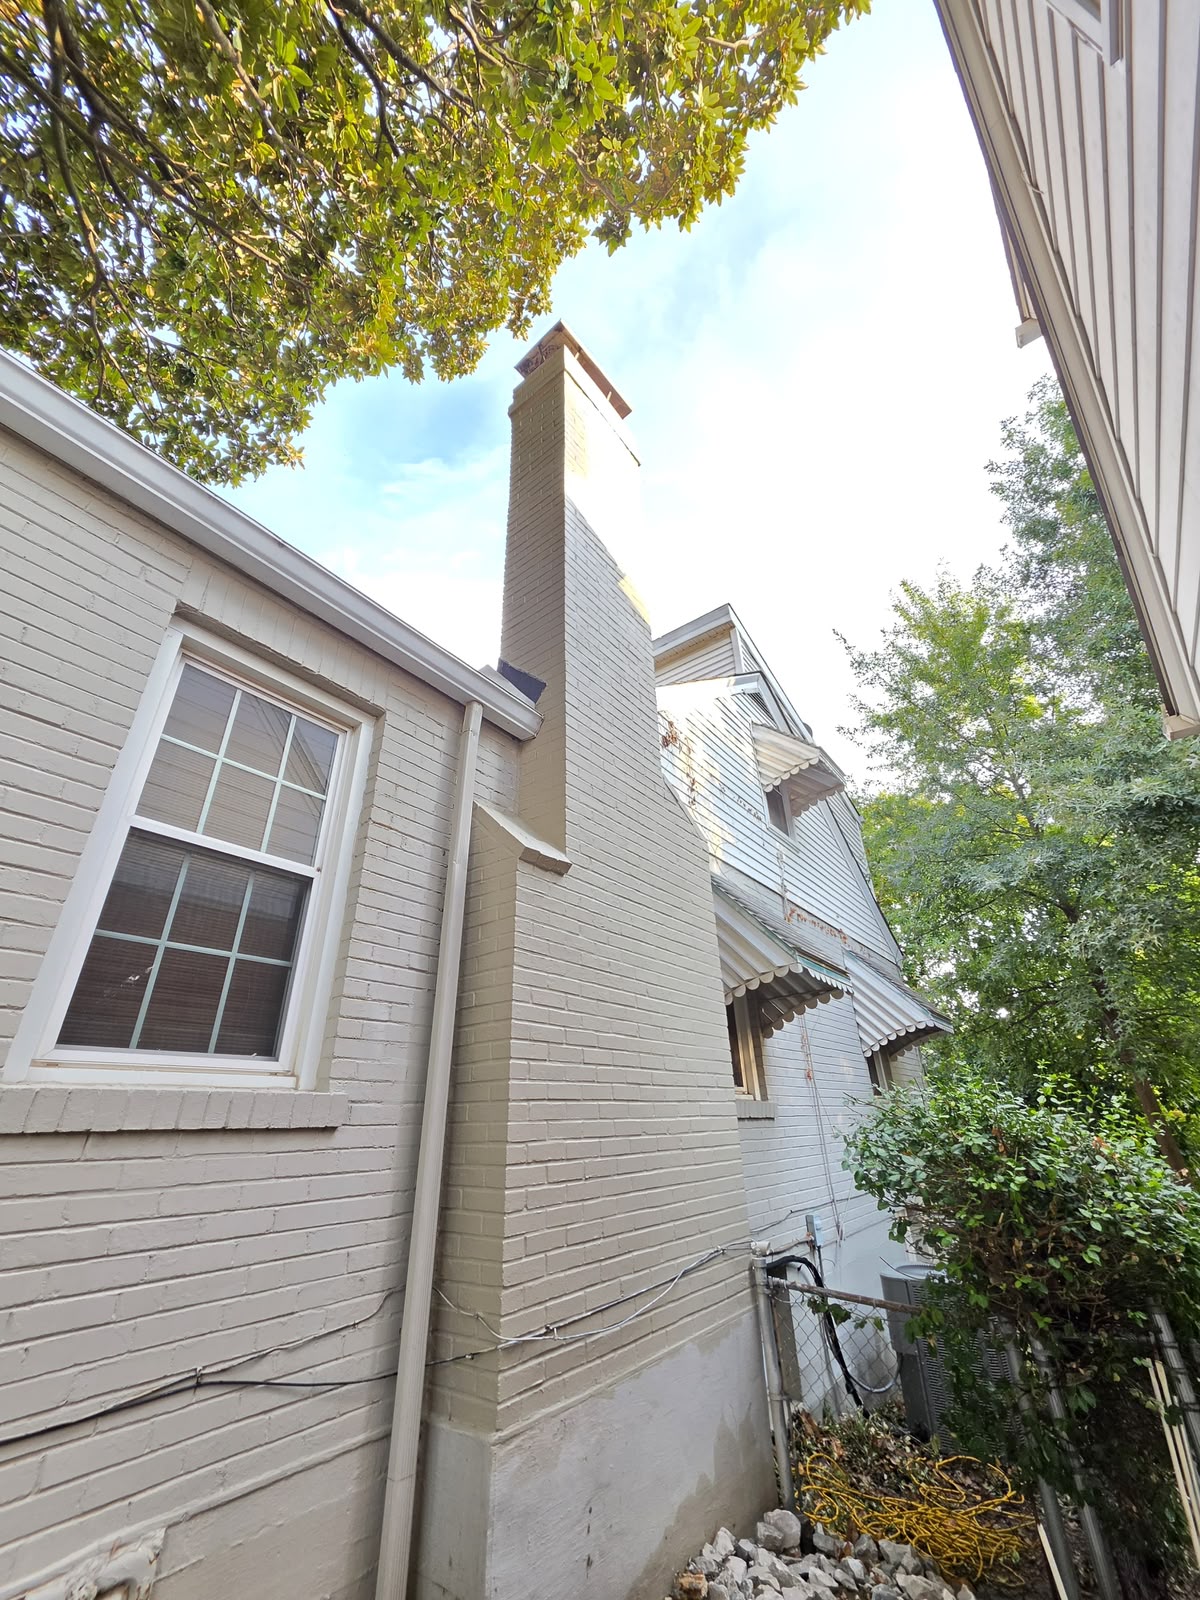
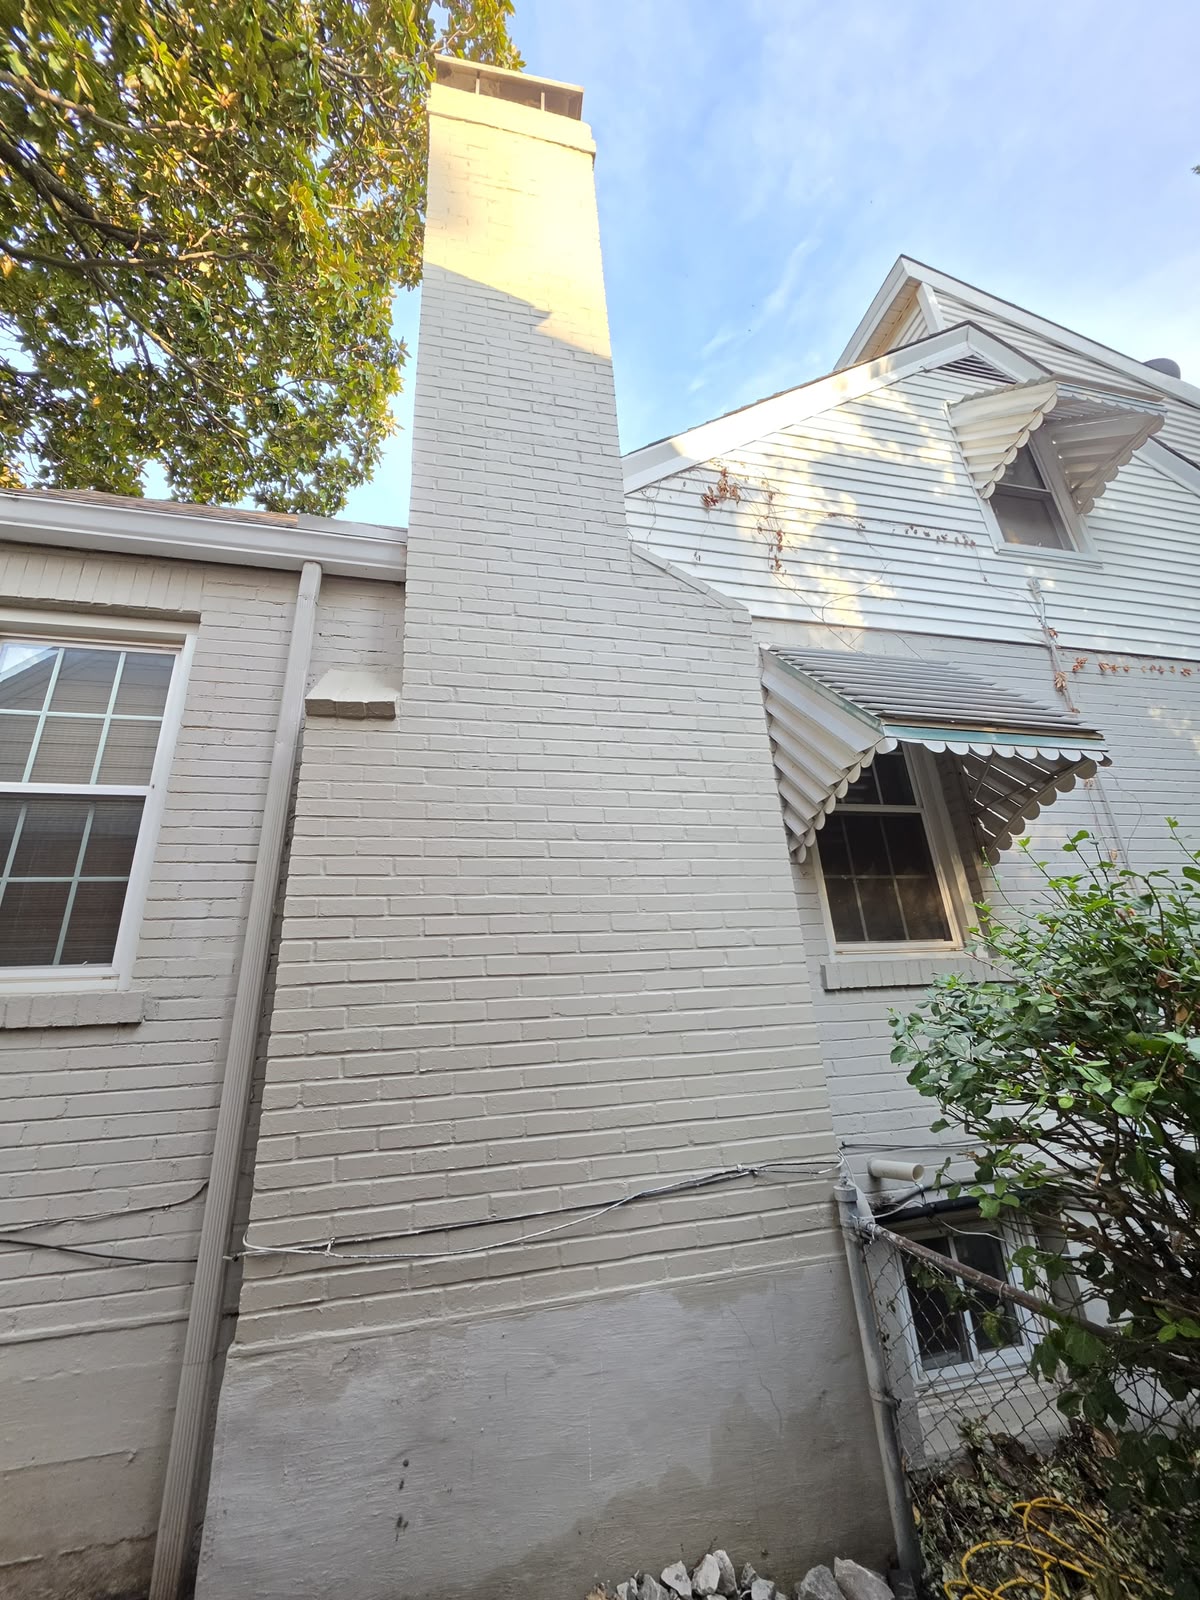
The chimney had already been painted before we got there, so leaving raw new masonry next to old painted brick was never going to look right. Once everything had cured we put on a water repellent, then a primer so the paint would bond instead of peeling off within a season, and painted it to match the existing colour.
The difference is that this time the paint is going over a chimney that has been rebuilt and has new mortar in every joint, not over the cracks.
How Long It Took
About two weeks from the signed estimate to the finished chimney, counting scheduling, letting the neighbours know, putting up and taking down the scaffolding, and the weather. The demolition, the rebuild and the masonry itself is four solid days of work on its own.
The Finished Result
Instead of the soldier stack that had pulled apart, the top is now laid horizontal. The flue tiles are new, every joint has fresh mortar, and the crown throws water clear of the brick instead of down the face of it. The colour is even from the roofline to the crown because there is nothing underneath it that needed hiding.
Signs a Repair Was Not Done Properly
- The chimney was painted right after the repair and you were never shown the masonry underneath
- The same leak comes back, sometimes within one season
- Only the area around the leak was repaired and the rest of the joints were left as they were
- New mortar was smeared over the old joints instead of the joints being cut out and replaced
- The crown is a thin slope of concrete with no overhang or drip edge, sometimes coated in sealant
- The top of the chimney is separating, or the corners look out of line
- Nobody ever gave you photos of what they found or what they did
Get an Estimate
We will inspect the chimney, photograph what we find, and tell you whether it needs new mortar, a partial rebuild or a full rebuild. Sun-Fri, 7:00 AM to 8:00 PM.